
Creating a fairy garden is a magical way to bring a little whimsy into your life. Lately, I’ve found myself daydreaming about tiny landscapes filled with colorful flowers and miniature accessories. There’s something soothing about crafting these charming little worlds, and I wanted to share that joy with you.
If you’re someone who loves gardening, crafting, or simply enjoys a bit of enchantment in your space, this post is for you. Whether you want to spend a relaxing weekend or just need a little pick-me-up, these DIY fairy garden accessories can spark your creativity.
In this post, I’ve gathered 25 fairy garden accessories DIY creations that are fun, simple, and sure to inspire you. You’ll discover ideas that fit any skill level, from beginners to seasoned crafters. Plus, these projects use materials you might already have at home.
Get ready to unleash your inner artist! You’ll not only find new ways to beautify your garden but also create special pieces that reflect your style. These projects promise a delightful escape into a world where magic and nature collide. So grab your glue gun and let’s get crafting!
1. Miniature Picnic Table
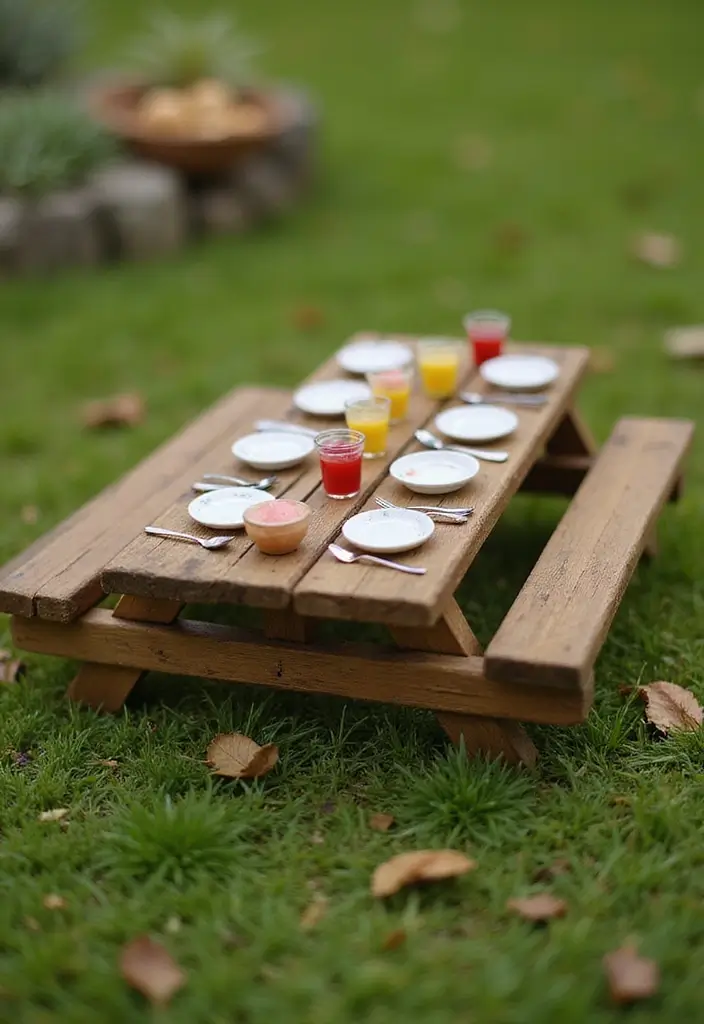
Imagine your fairy garden adorned with a charming miniature picnic table. This lovely addition creates an inviting spot for your fairy friends to gather and enjoy their tiny feasts. You can easily make one using leftover wood scraps or popsicle sticks. Think about painting it bright colors like sunny yellow or sky blue to add a cheerful touch, or keep it natural for a rustic vibe. Pinterest is buzzing with similar DIY projects, and they’re all about celebrating creativity in small spaces.
To start crafting your picnic table, measure the size you want. Cut your pieces carefully, then assemble the legs and tabletop using wood glue. Make sure to sand the edges to prevent any splinters. If you’re on a budget, consider using materials you already have at home. After your table is ready, add tiny dishes made from beads or buttons. This simple touch brings the scene to life, sparking imagination and stories in your garden.
• Gather scraps: Use leftover wood or popsicle sticks.
• Measure carefully: Ensure your table fits your fairy garden.
• Paint or finish: Choose bright colors or a natural look.
• Add tiny dishes: Use beads or buttons for extra charm.
Creating this picnic table is not just a project; it’s a way to enhance your garden’s magic. It invites creativity and makes your fairy realm feel alive and enchanting.
2. Fairy Swing
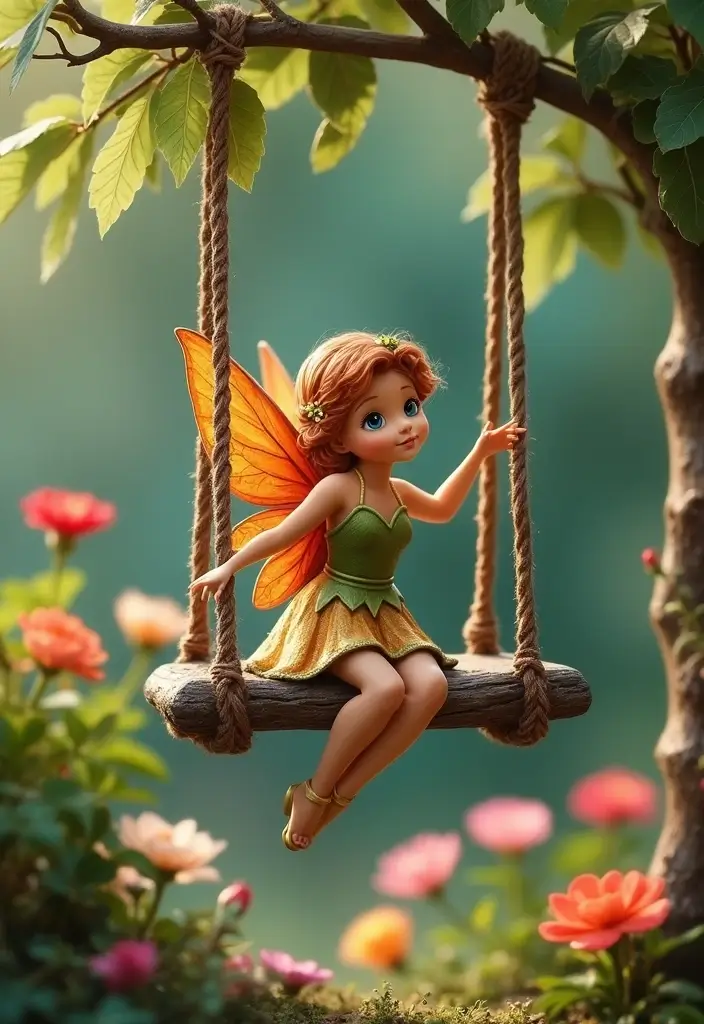
Create a charming fairy swing to bring your garden to life! A swing is not just a decorative piece; it sparks imagination and joy as you envision fairies giggling and swaying in the breeze. Picture a small wooden seat painted in soft pastel colors, hanging from delicate twine. You might even consider adding vibrant flower petals for extra comfort and flair. This kind of accessory is trending on platforms like Pinterest, where DIY enthusiasts showcase their whimsical designs, making every fairy garden feel magical.
Building your fairy swing is simple and cost-effective. Grab a piece of scrap wood, twine, and some basic tools like scissors and glue. Cut the wood into a seat shape, then tie the twine securely on both sides. Hang it from a sturdy tree branch or a garden post. You can even use natural materials like seashells or leaves for a unique twist. This project not only fits any budget but also allows you to express your creativity. Imagine the delight it brings, making your garden a perfect spot for storytelling and play.
• Use twine to hang the swing securely
• Choose colorful wood or natural materials for the seat
• Add flower petals for a cozy touch
• Place it in a visible spot for maximum charm
Your fairy swing will not only beautify your garden but also invite playful daydreams and laughter. So, gather your materials and let your creativity soar!
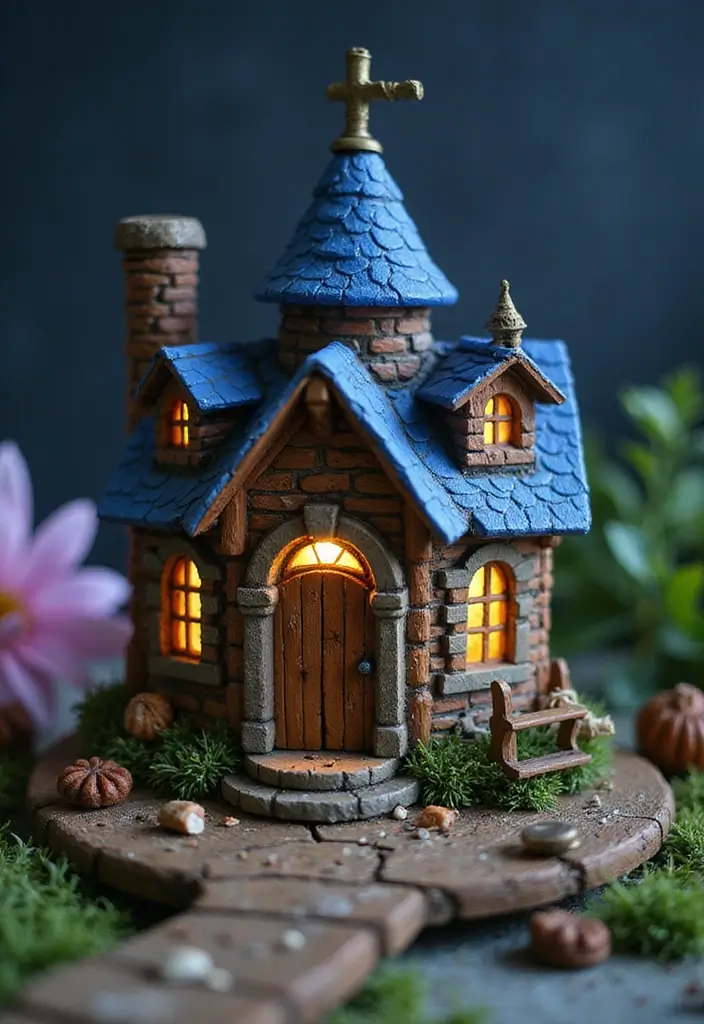
3. Tiny Fairy House
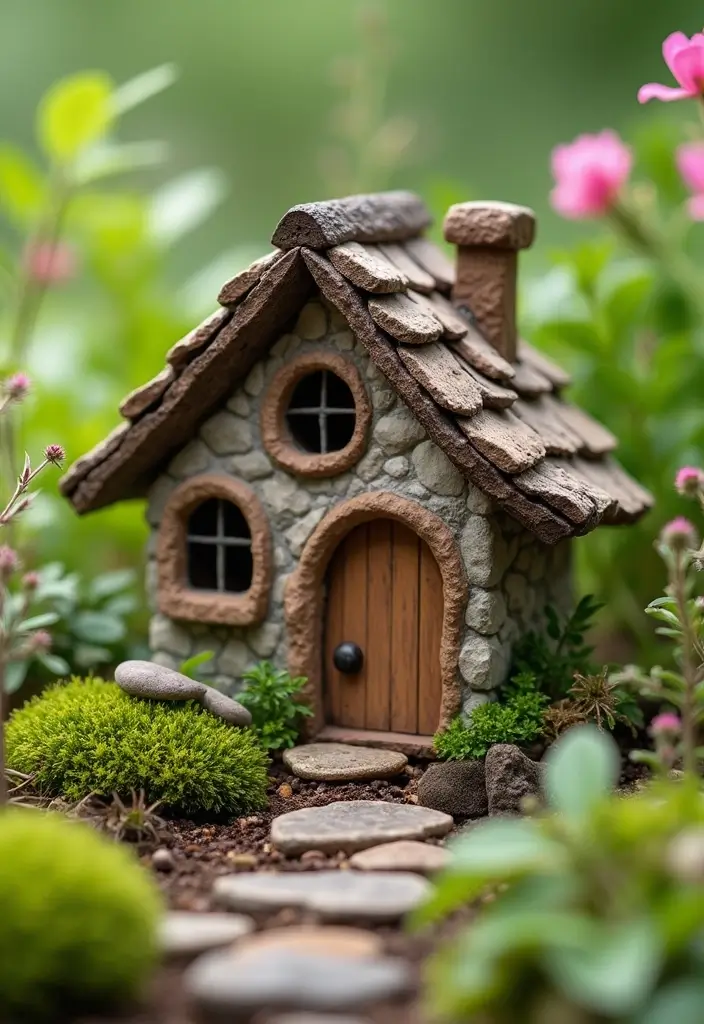
Create a magical touch in your fairy garden with a tiny fairy house! This charming addition serves as a cozy retreat for your miniature friends. Picture this: a delightful dwelling crafted from natural materials like stones, twigs, and bark. Gather your supplies, starting with a solid base made from stones for a sturdy foundation. Then, use twigs or bark to build the walls, and finish it off with a leafy roof or more twigs. Bright colors can make your fairy house pop, drawing in all the enchanting spirits.
To make your fairy house even more special, consider adding cute decorations around the entrance. Little flowers, pebbles, or even tiny signs can enhance its charm. You can find inspiration for these designs on platforms like Pinterest, where whimsical styles are trending.
When you’re ready to dive in, here are some tips to help you create your tiny fairy house on a budget. Look for natural materials in your yard or local parks. Collecting stones and twigs doesn’t cost a thing! Also, think about mixing in painted items, like small wooden blocks, to add a splash of color. Your fairy house can reflect your personality and style, making your garden feel more inviting and alive.
• Use stones for a strong foundation
• Choose twigs and bark for natural walls
• Add colorful decorations to attract fairies
• Place flowers or pebbles near the entrance for charm
With a bit of creativity and effort, you can craft a fairy house that not only beautifies your garden but also sparks joy and imagination. Your tiny fairy house will surely become a beloved feature in your enchanted garden!
4. Whimsical Garden Pathway
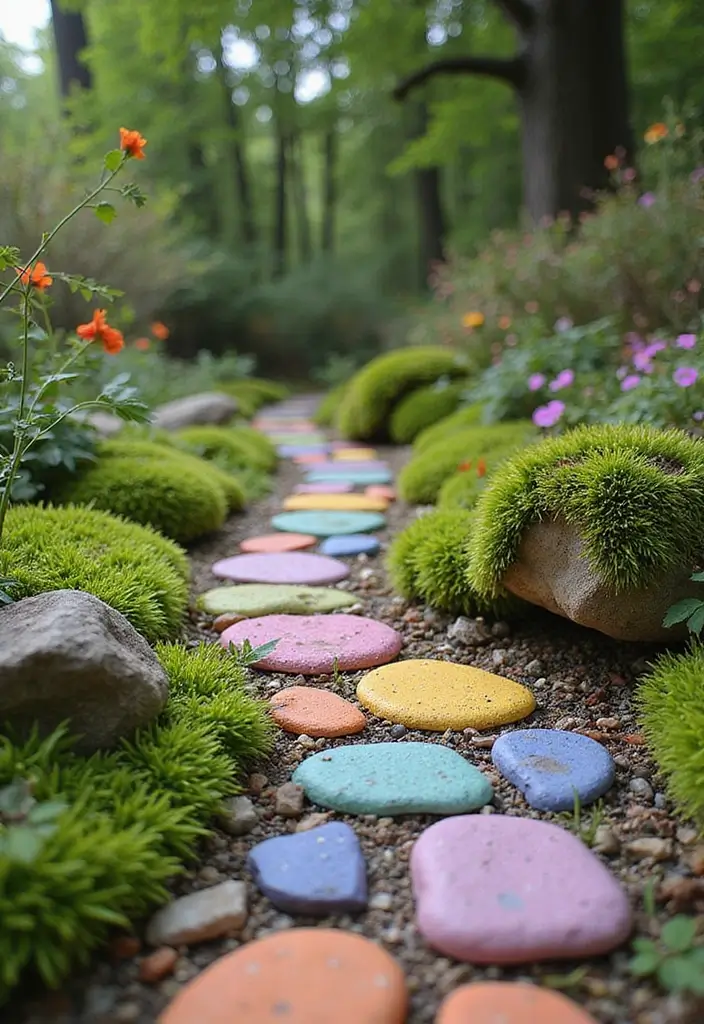
Create a charming garden pathway to guide your fairies on their magical adventures! This whimsical touch not only enhances your fairy garden’s beauty but also sparks the imagination. You can craft a delightful path using small pebbles, colorful tiles, or even hand-painted stones. Picture a meandering trail of vibrant stones winding through your garden, inviting fairies to explore every nook. Pinterest is buzzing with ideas on how to make these pathways pop with color and creativity.
To get started, pick a spot in your garden where you want the path to go. Lay out the shape with a hose or string to visualize it first. Then, fill the outline with your chosen materials. Want to save some money? You can collect pebbles from your yard or nearby riverbanks. For extra charm, place tiny flower pots or miniature lanterns along the sides. These small details create a cozy atmosphere that feels welcoming and magical, perfect for sparking fairy tales in your mind.
• Use small pebbles or painted stones for a unique look
• Choose bright colors to create fun patterns
• Add tiny flower pots for a cozy feel
• Place miniature lanterns to light the way at night
With a little creativity and effort, your fairy garden pathway will not only define the space but also invite endless stories of wonder and adventure. Enjoy the process and watch your fairies come to life!
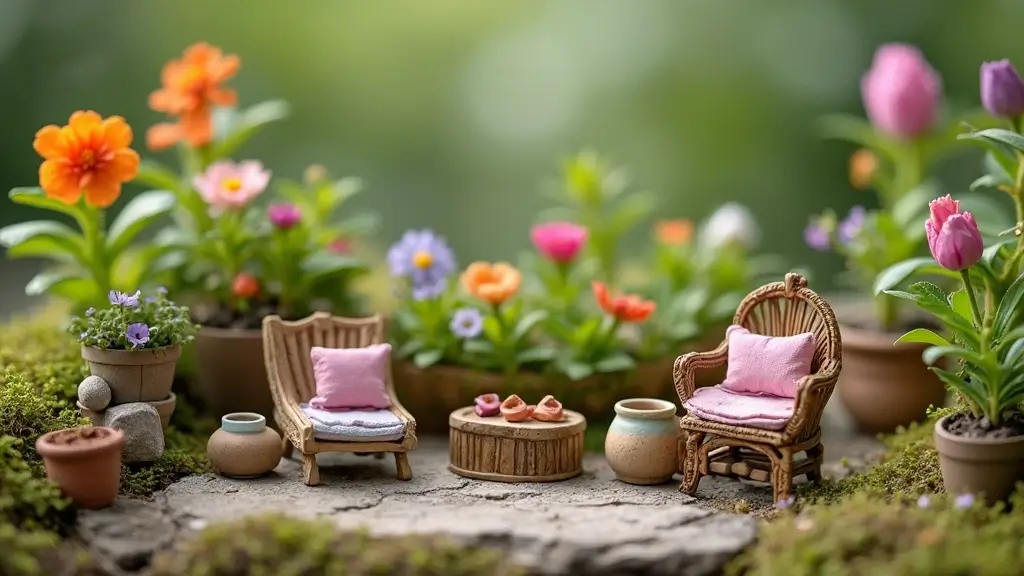
5. Miniature Garden Bench
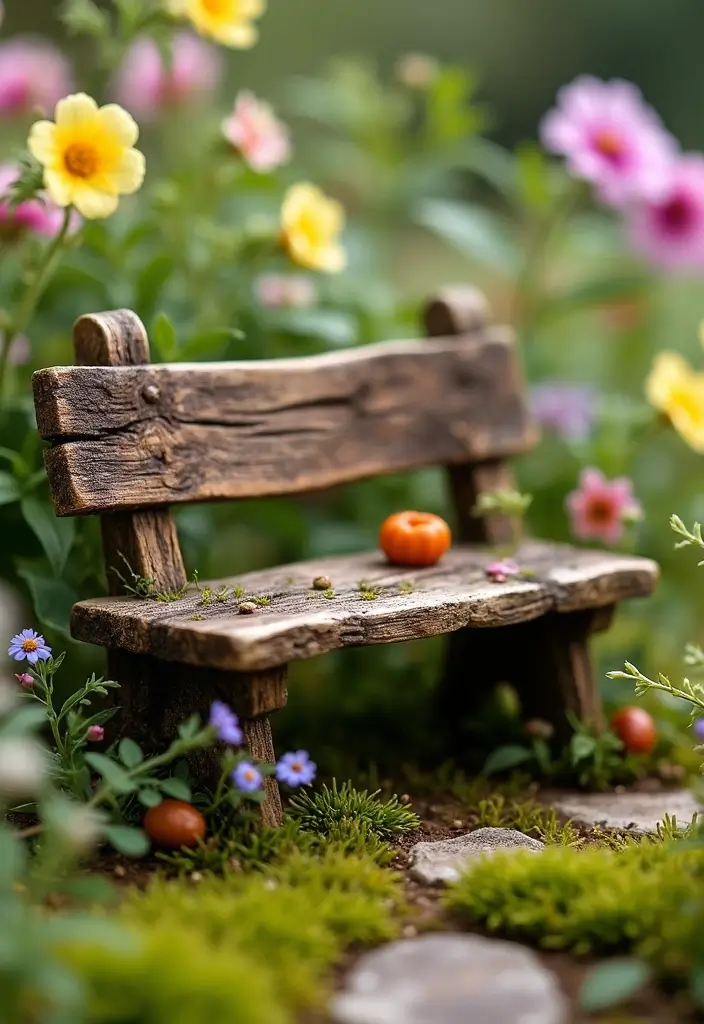
Create a charming spot for fairies to unwind with a delightful miniature garden bench. This small seating area adds a whimsical touch to your fairy garden. You can craft it from various materials like popsicle sticks, twigs, or even leftover wood pieces. Imagine painting it in soft pastels or vibrant colors to match your garden’s theme. Pinterest is filled with ideas showcasing these enchanting benches, inspiring you to add your twist.
To make one, start by cutting your chosen materials into equal lengths. Assemble them into a simple bench shape, ensuring it’s sturdy enough for tiny fairy visitors. You can also decorate it with small flowers or leaves, blending it seamlessly into your garden. If you’re on a budget, use items you already have at home, making this project both fun and affordable. This bench not only provides a resting place but also enhances the magical feel of your garden, making it perfect for storytelling moments or fairy tea parties.
• Use popsicle sticks or twigs for a natural look
• Paint in bright colors to match your garden
• Decorate with flowers for a whimsical touch
• Place near fairy houses for a cozy vibe
Now, let your imagination soar as you create your fairy garden bench. With just a few materials and a sprinkle of creativity, you can craft a beautiful addition that invites magic into your outdoor space.
6. Tiny Fairy Pond

Create a whimsical atmosphere in your fairy garden with a charming tiny fairy pond. This enchanting feature invites fairies and adds a serene touch to your green space. You can easily make a pond using a shallow dish or a small container. Fill it with water and surround it with colorful stones, sparkling pebbles, or even tiny plants. As a delightful finishing touch, float some flowers on the surface to enhance the magical vibe. This idea is trending on Pinterest, where many garden enthusiasts showcase their own fairy ponds.
Ready to get started? First, choose a spot in your garden where the pond can shine. Aim for a place that gets a bit of sunlight, as fairies are said to love warmth! Use affordable materials like a repurposed dish or an old pot. If you want to keep it simple, just add water and stones. For a splash of color, consider adding a few bright flowers or miniature figurines, like tiny fish or frogs, to give your pond a playful touch. Your fairy pond will become a peaceful retreat, making your garden feel inviting and full of life.
• Use a shallow dish or container for the pond
• Surround with colorful stones or pebbles
• Add miniature plants or figurines for fun
• Float flowers for extra charm and beauty
7. Fairy Garden Bridge
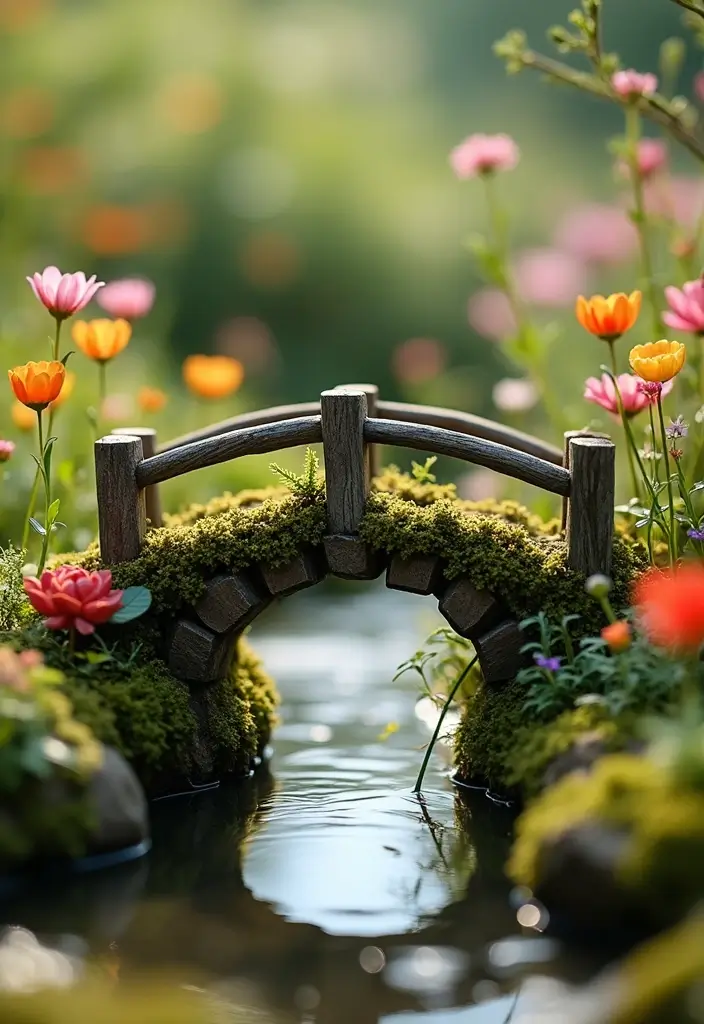
Bring a touch of magic to your fairy garden with a delightful bridge! This charming feature adds more than just beauty; it connects different areas of your miniature landscape, inviting imagination and storytelling.
You can easily create a bridge using small wooden slats or craft sticks. Try painting it in cheerful colors like bright blue or sunny yellow to stand out against the lush greenery. If you want to elevate its charm, think about adding tiny flowers or fairy lights. These accents glow beautifully at night, creating an enchanting atmosphere. Pinterest is buzzing with ideas for whimsical bridges, so you’ll find plenty of inspiration there!
When building your bridge, keep a few practical tips in mind. Choose lightweight materials that are easy to work with, making it budget-friendly. You can even use recycled materials, like popsicle sticks or cardboard. Ensure that your bridge is sturdy enough for those tiny fairy visitors to cross without a worry. This thoughtful touch makes your garden feel alive and inviting, perfect for sparking joy and creativity.
• Use lightweight wooden slats or craft sticks for easy construction
• Paint in bright colors to create a whimsical look
• Add tiny flowers or fairy lights for nighttime magic
• Ensure stability for safe crossings by fairies
With these simple steps, your fairy garden bridge will not only enhance the visual appeal but also inspire enchanting tales of fairy adventures. You’ll love how this small addition transforms your garden into a magical realm!
8. Fairy Lanterns
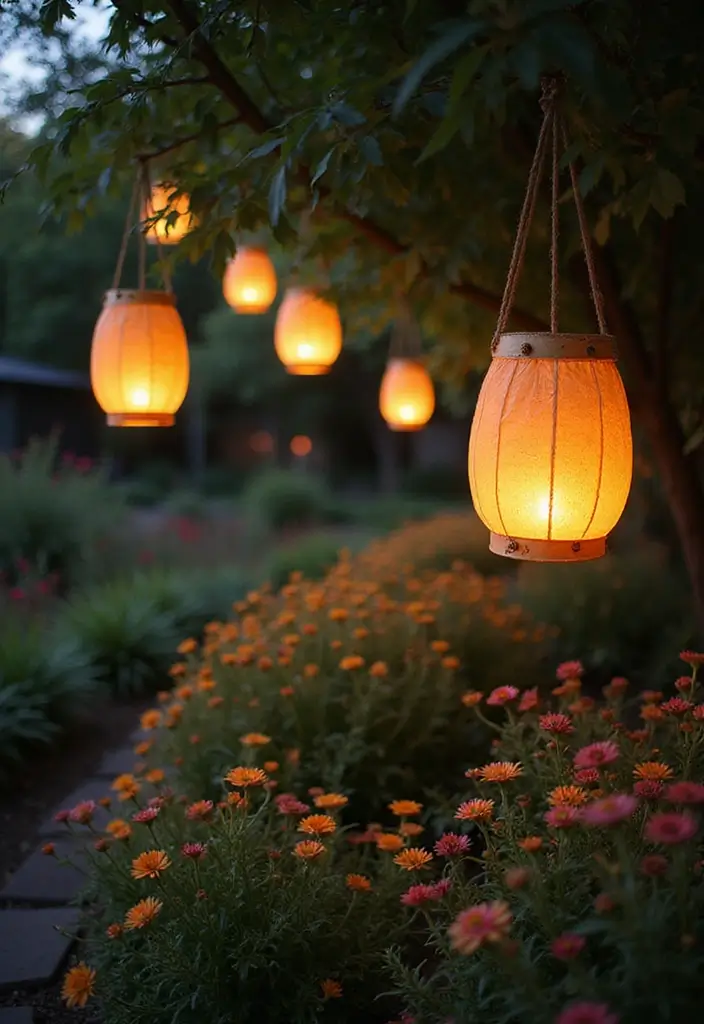
Light up your fairy garden with whimsical fairy lanterns! These charming lights add a magical glow and create a cozy atmosphere. You can easily make them using small jars and LED tea lights, materials that are often already at home. Try painting the jars in soft pastels or bright colors, or wrap them in colored tissue paper for a playful touch. Add glitter for extra sparkle! When night falls, the LED tea lights inside will illuminate the jars, making your garden twinkle like a fairy tale.
Hang your lanterns from tree branches or place them along garden paths to guide your fairies home. This not only enhances the enchanting vibe but also adds a unique charm to your outdoor space. Pinterest is filled with ideas showing how these lanterns can transform any garden setting into a wonderland.
To get started, gather some affordable materials. Visit a local craft store or check for jars you might have at home. Consider using twine or natural rope to hang them, creating a rustic feel. You can also build small stands from sticks or twigs to elevate the lanterns, making them more visible and adding depth to your garden design. This cozy lighting makes evening gatherings feel intimate and special, perfect for family and friends.
• Use small jars for a magical look
• Choose LED tea lights for safety
• Hang lanterns for a whimsical touch
• Add glitter or paint for a fairy-tale effect
9. Miniature Garden Tools
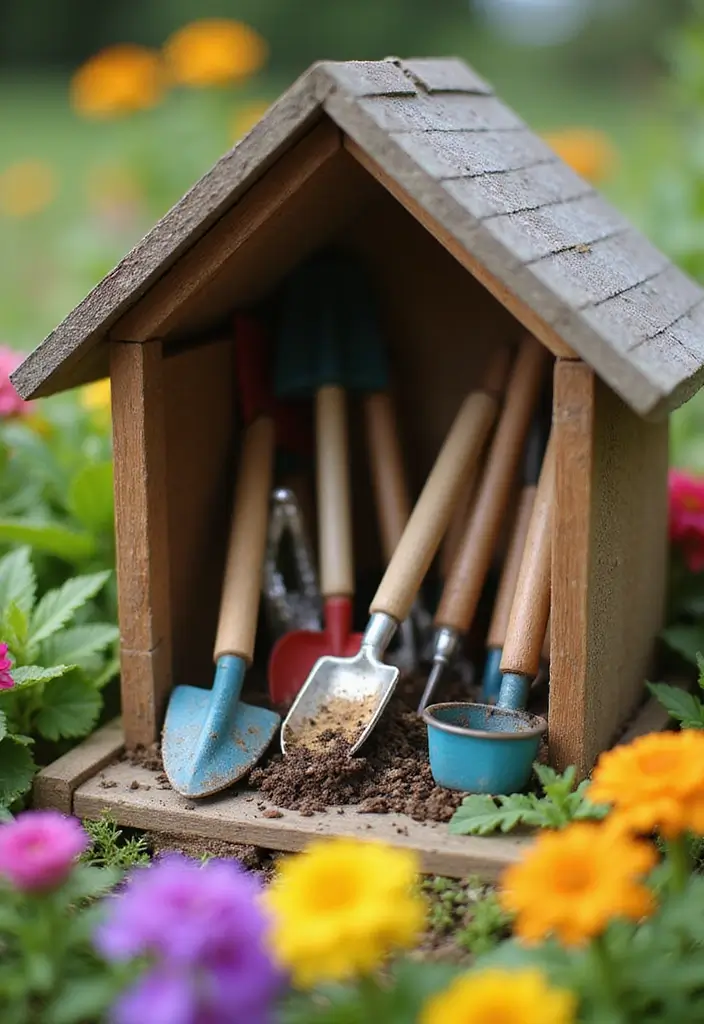
Bring a splash of realism to your fairy garden with charming miniature garden tools. These tiny treasures, like shovels, rakes, and watering cans, add a touch of practicality while enhancing the whimsical vibe of your creation. You can easily make them using air-dry clay or repurpose small items such as bottle caps and spoons. Paint them in cheerful colors or leave them natural for a rustic feel. Pinterest is buzzing with these delightful additions, showing how they can truly elevate your fairy garden.
To create these mini tools, gather affordable materials from craft stores or your home. Small wooden dowels can serve as handles, while clay can be shaped into various tool designs. This DIY project is not only budget-friendly but also invites creativity. Consider building a tiny gardening shed from scrap wood to store your tools. This cute detail pulls your fairy garden together and gives it a cohesive look, making it feel like a magical, thriving space.
• Make tiny tools using clay or repurposed items for a budget-friendly approach.
• Paint in bright colors to add personality and charm.
• Build a mini gardening shed for storing your tools and enhancing the theme.
• Inspire imaginative play as fairies tend to their gardens with these delightful accessories.
These miniature garden tools not only look adorable but also spark your imagination. They help create a story within your fairy garden, making it a magical retreat for both kids and adults alike. Get started and let your creativity bloom!
10. Fairy Mailbox
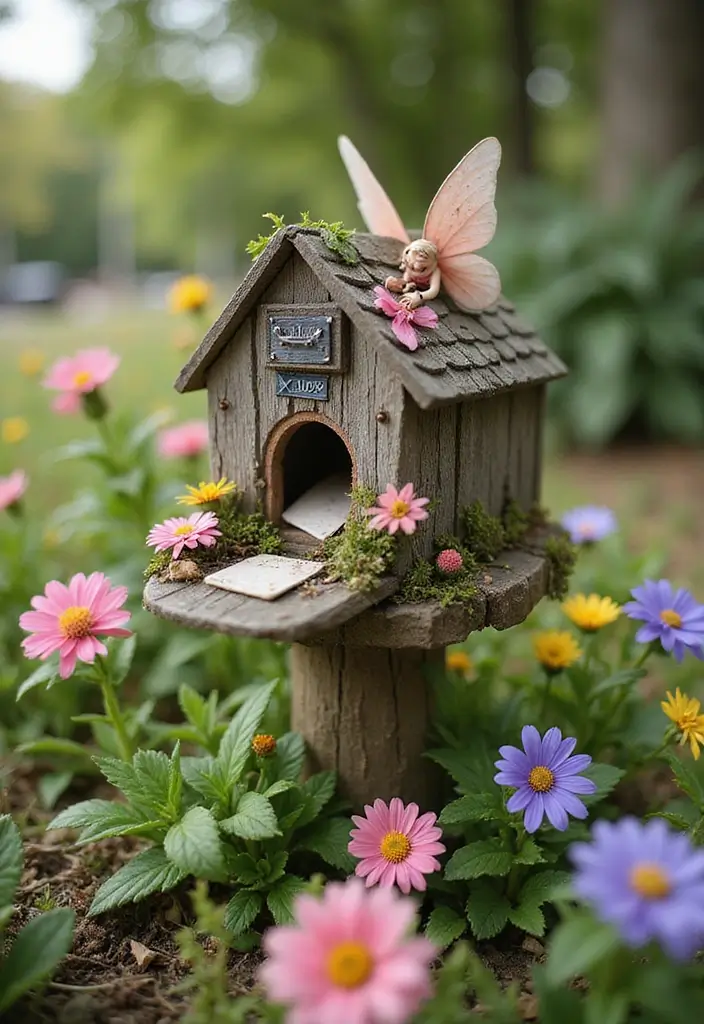
A fairy mailbox adds a sprinkle of magic to your garden. This enchanting accessory invites imagination and storytelling. You can make one easily using a small cardboard box or a wooden block. Paint it in bright colors like cheerful reds or soft pastels. Add glitter or whimsical stickers for that fairy-tale touch. Place your mailbox in a cozy corner of your garden, where it can be a secret spot for fairy mail.
Imagine leaving tiny notes or wishes for your fairy friends. You can even fill the mailbox with mini envelopes crafted from leaves or colorful paper. Pinterest is full of creative ideas, showing how this small addition can spark joy and creativity. A mailbox shaped like a mushroom or flower can make it even more special and fun.
To create your fairy mailbox, gather materials you already have at home to save money. You can use recycled cardboard or leftover paint, making this project budget-friendly. This charming accessory fits well with other fairy garden elements, enhancing the whimsical atmosphere. In the end, it makes your garden feel alive and full of stories waiting to be told.
• Use a cardboard box for a simple, quick build
• Paint it in bright colors to attract attention
• Fill it with tiny envelopes for added fun
• Choose a whimsical shape like a mushroom for uniqueness
11. Miniature Fairy Garden Fountain
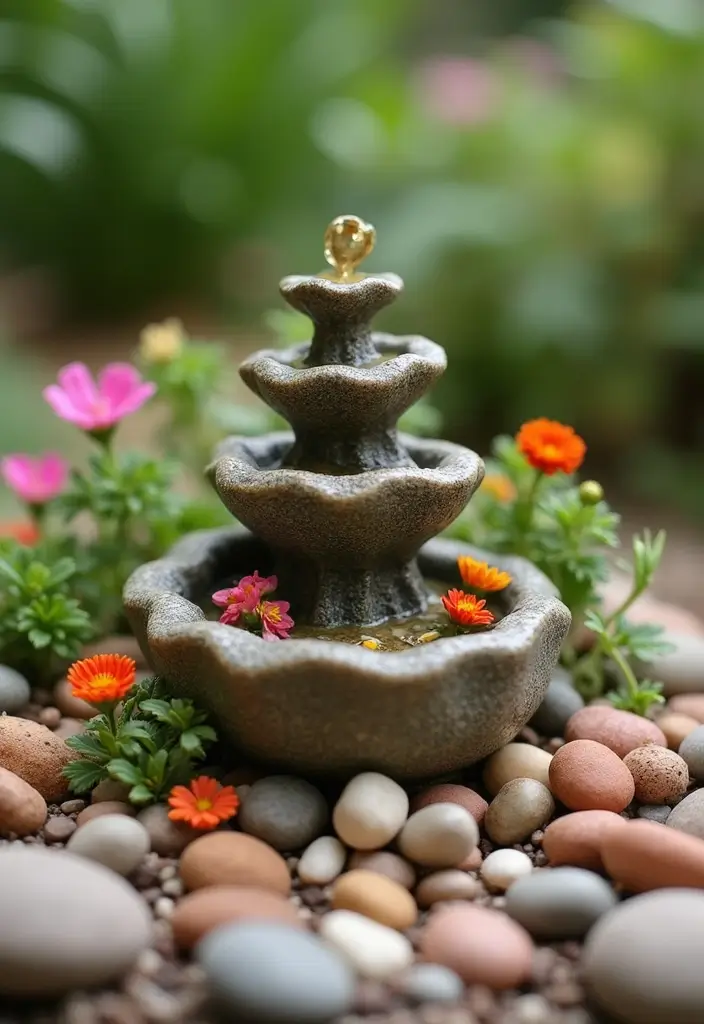
Imagine stepping into your fairy garden and hearing the gentle sound of water trickling from a charming fountain. This delightful addition can truly transform your enchanting space! You can craft a stunning fountain using a simple bowl or an old planter. Add a small pump for a flowing effect or fill it with water for a still oasis. Decorate the fountain with smooth pebbles or colorful stones to blend beautifully with surrounding greenery. Tiny flowers can float on the water’s surface, creating a picturesque scene that fairies would love.
To bring your fairy fountain to life, consider these easy tips. First, look for materials around your home or at local thrift stores. You can find bowls, pots, or even old birdbaths that can serve as a fountain base. If you’re working with a limited budget, consider using a small solar pump. These are often inexpensive and eco-friendly, letting you enjoy running water without needing an electrical outlet.
This little feature doesn’t just add beauty; it creates a serene atmosphere perfect for relaxation or meditation. Picture yourself sipping tea beside your fountain, feeling the stress of the day wash away.
• Use an old bowl or planter for a unique base
• Add a solar pump for an eco-friendly water source
• Decorate with pebbles and tiny flowers for charm
• Ensure the fountain’s base is deep enough for stability
12. Fairy Garden Trellis
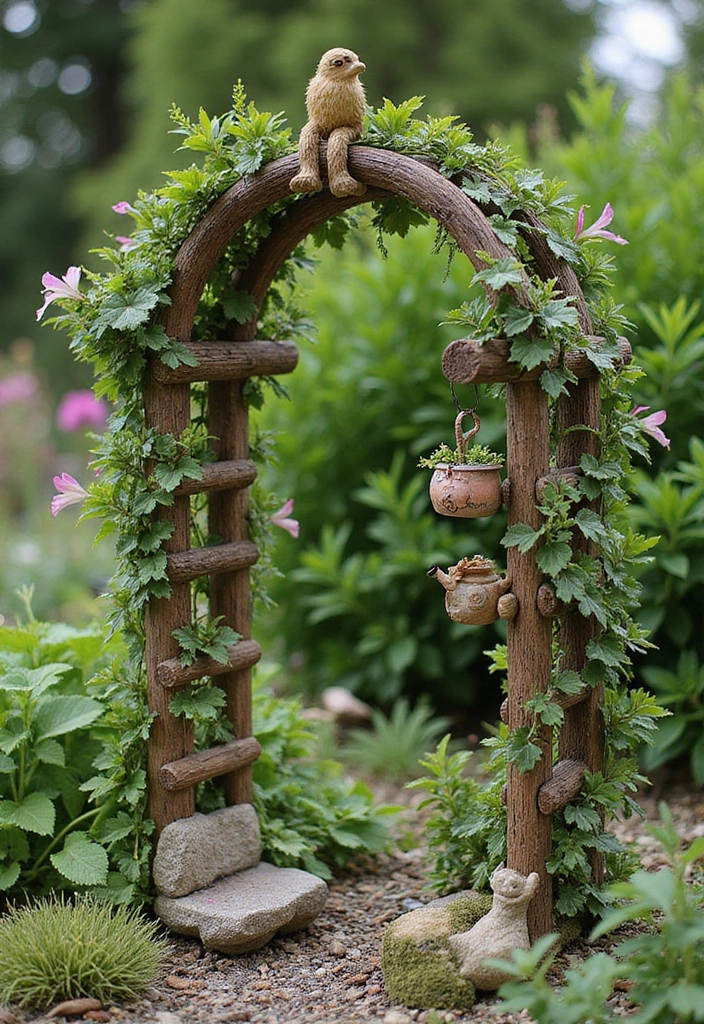
A fairy garden trellis can be the perfect touch to elevate your miniature landscape. It adds height and charm while providing support for your climbing plants. You can easily create one using simple materials like popsicle sticks or twigs. Assemble them in a grid-like pattern and secure with glue for a sturdy structure. You might choose cheerful colors, like soft pastels or bright hues, to make it stand out. Place your trellis in a sunny spot to help your plants thrive. Pinterest loves these whimsical designs, and they can truly transform your garden into a magical retreat.
To bring your trellis to life, consider planting climbing flowers like sweet peas or morning glories. These plants not only look beautiful but also create a lush backdrop. If you want to add an extra sprinkle of magic, hang tiny decorations like fairy bells or colorful flowers from the trellis. This little detail can make your garden feel enchanting, perfect for inviting friends to share in the wonder.
Here are some practical tips to make your trellis shine:
Use natural materials like twigs for an organic look.
Choose bright, non-toxic paints for a playful vibe.
Add climbing plants like peas or morning glories for lush greenery.
Place your trellis in a sunny area to encourage plant growth.
Creating your fairy garden trellis is not just about looks; it’s about building a little world that inspires joy and creativity.
13. Miniature Fairy Campfire

Bring warmth and charm to your fairy garden with a delightful miniature campfire! This cozy gathering spot invites imagination and storytelling. Picture tiny fairies huddled around a flickering fire, sharing tales under the stars. You can easily create this scene using small twigs and a touch of clay or glue to hold everything together. Arrange the twigs in a circle to form a fire pit, and surround it with small stones that serve as seats for your fairy friends.
For an extra fun detail, add tiny marshmallows on sticks to the mix! This playful touch enhances the campfire vibe, making it even more enchanting. Pinterest is buzzing with these adorable setups, showcasing how they really add a narrative flair to any garden.
To make your mini campfire, gather materials from your backyard or a nearby park. Twigs are free and easy to find, while clay can be a budget-friendly option from craft stores. Consider using orange and yellow paper or fabric to mimic dancing flames. Just cut them into small shapes and place them around the twigs; they’ll bring your fire to life!
Creating this accessory is not only affordable but also a wonderful way to spark creativity. Imagine watching your children or friends create stories around the campfire, making your garden feel magical and inviting.
• Use small twigs to create the fire pit
• Choose colorful paper for realistic flames
• Add tiny stones for fairy seating
• Place marshmallows on sticks for fun detail
14. Fairy Garden Signpost
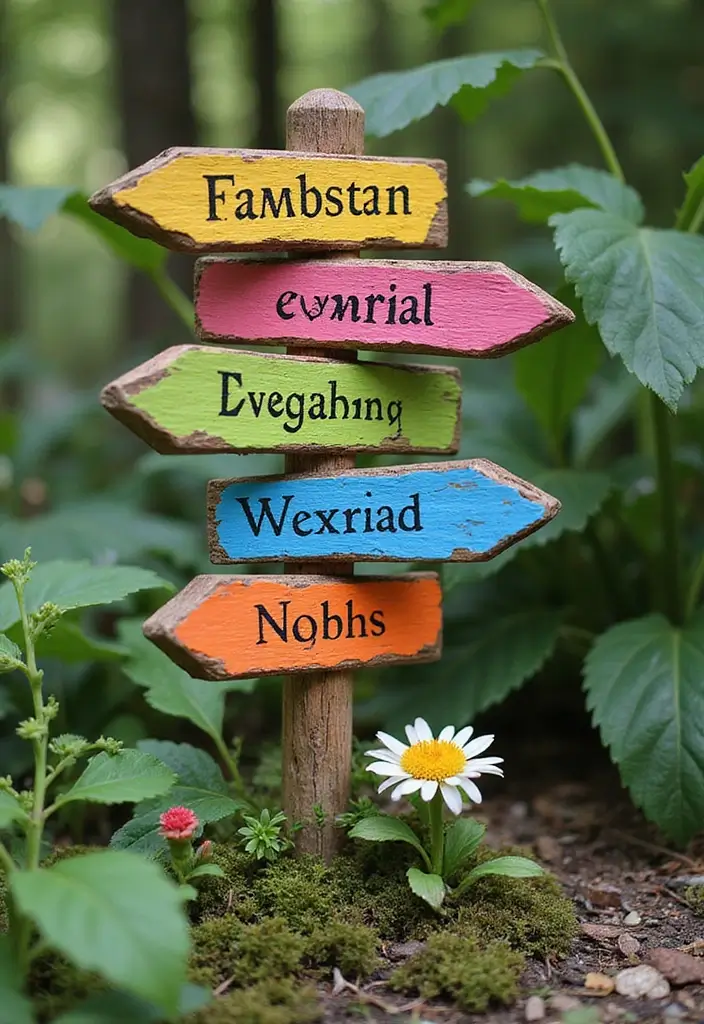
Create a whimsical touch in your fairy garden with a delightful signpost. This charming accessory helps guide your fairies to their favorite spots, like ‘Enchanted Meadow’ or ‘Gnome Village.’ Use small branches or pieces of wood for a rustic feel, and paint them in bright colors. Try playful fonts that add personality to each sign. You can even find inspiration on Pinterest, where fairy garden signposts are trending for their creative flair.
To make your signpost, gather materials that won’t break the bank. You can find small sticks in your yard or at a craft store. Paint your signs with non-toxic acrylic paint to keep it safe for the environment. Secure them onto a larger post to ensure they stand tall and proud. This addition not only enhances your garden’s beauty but also sparks your imagination, inviting stories and adventures for everyone who visits.
• Use colorful paints for eye-catching designs
• Choose whimsical phrases for each sign
• Balance on a sturdy base for stability
• Add tiny decorations like flowers or stones around the post
This enchanting feature will make your fairy garden a place where dreams come alive, encouraging imaginative play and storytelling for all ages.
15. Miniature Fairy Bakery
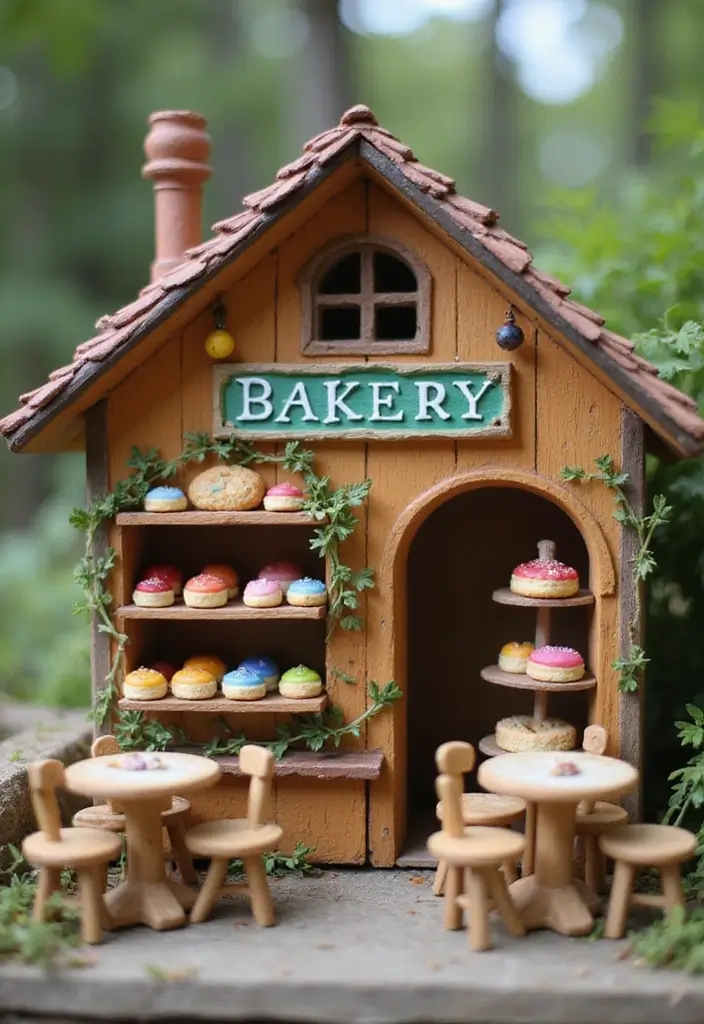
Create a charming spot in your fairy garden with a delightful miniature bakery! This sweet addition will add a sprinkle of joy and creativity to your outdoor space. Picture a tiny building crafted from cardboard or wood, painted in pastel colors to mimic icing. You can use vibrant paper to make it pop even more. Fill it with charming miniature pastries made from clay, beads, or buttons. These little treats can include tiny cupcakes, donuts, or even a loaf of bread!
Set up a cozy outdoor seating area where fairies can gather to enjoy their sweet delights. Tiny tables and chairs can be made from sticks or small stones, giving your bakery a whimsical feel. It’s a trend popping up on Pinterest, inspiring many to create these enchanting spaces. This sugary scene will spark the imagination and invite stories of fairies enjoying their favorite pastries.
To bring your fairy bakery to life, start by gathering materials you already have at home. Cardboard is a great choice since it’s easy to cut and shape. You can also find small objects like buttons or beads to create pastries, making this project budget-friendly. Don’t forget to add a touch of magic with a little sign that reads “Fairy Bakery!”
This simple yet charming project can make your fairy garden feel even more inviting. It’s a perfect way to inspire creativity in kids and adults alike, making your garden a delightful storybook scene.
• Create a bakery with cardboard or wood for charm
• Use colorful paper or paint to decorate the exterior
• Fill it with tiny treats made from clay, beads, or buttons
• Set up a seating area with small tables and chairs for fairies to gather
16. Fairy Garden Beach Scene
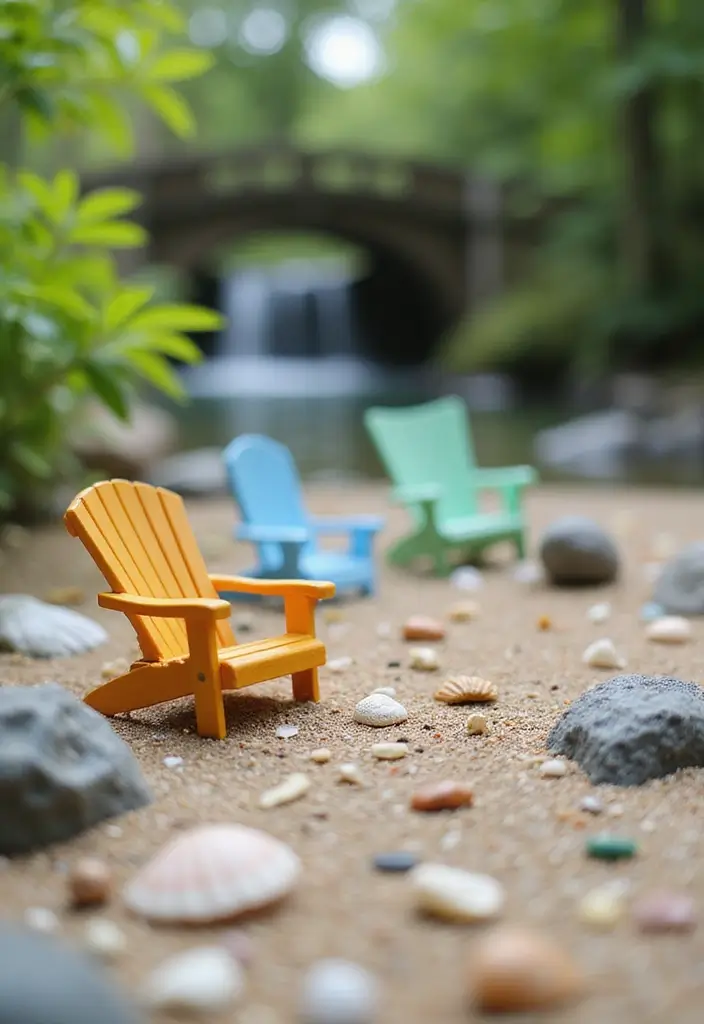
Bring the magic of the beach to your fairy garden! Imagine tiny fairies lounging under colorful umbrellas or basking in the sun. You can create a whimsical beachfront scene using sand, shells, and pebbles. Incorporate vibrant colors, like bright blues and sunny yellows, to evoke that summer vibe. Pinterest loves these beachy themes, and you can easily join the trend by adding charming touches.
Start by layering sand to form a beach area. Scatter small shells and pebbles to mimic the shoreline. You can even make tiny beach chairs and umbrellas from paper or fabric. Don’t forget a mini surfboard! You can craft one from thin wood or cardboard, giving your fairies the perfect accessory for fun in the sun.
To make this scene come alive, consider using a small blue container as a pool or pond. It adds a refreshing oasis for your fairies. This design approach is budget-friendly, as you can find many materials around your home or at local craft stores. Embrace this delightful beach scene for your fairy garden, transforming it into an enchanting vacation spot for your tiny friends.
• Use sand and shells for realistic beach vibes
• Craft tiny beach chairs from paper or fabric
• Create a mini surfboard for a playful touch
• Add a small blue container as a pool or pond
17. Miniature Fairy Theater
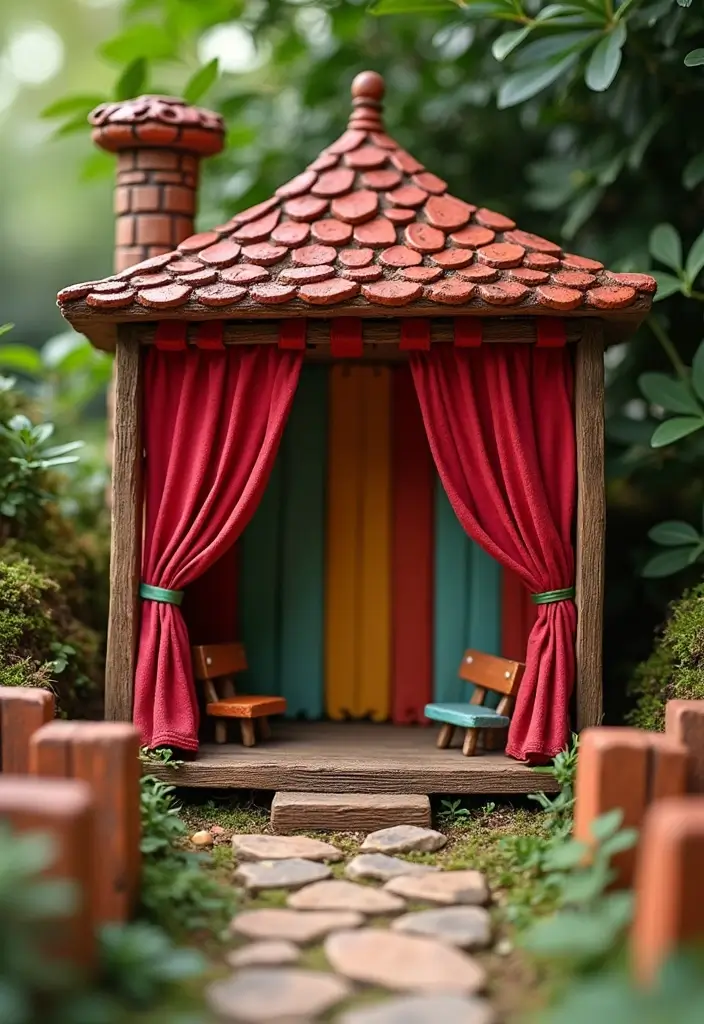
Imagine a charming world where fairies gather for their own dazzling performances. A miniature fairy theater adds a magical touch to your fairy garden, inviting creativity and storytelling. You can easily create a simple stage from a flat piece of wood or cardboard. Decorate it with tiny curtains made from colorful fabric scraps. Choose vibrant hues like deep purple or soft pink to catch the eye.
Add tiny seats using buttons or caps. This not only provides a place for your fairy audience but also adds a whimsical feel. Pinterest is full of similar ideas, showcasing how a fairy theater can enhance your garden’s charm and encourage imaginative play.
Now, let’s make it happen! Start by gathering materials from around your home. You can find buttons, fabric, and even old cardboard lying around. This project is budget-friendly and easy to personalize. You could even paint the stage or add glitter for a touch of sparkle.
Your fairy theater will not only be a delightful addition but also a perfect spot for storytelling. It brings a sense of wonder, making your garden feel truly enchanted.
• Use colorful fabric for curtains to create drama
• Choose buttons or caps for seats to save money
• Paint the stage with bright colors for a cheerful vibe
• Add a backdrop with fairy tale scenes for inspiration
18. Fairy Garden Wind Chimes
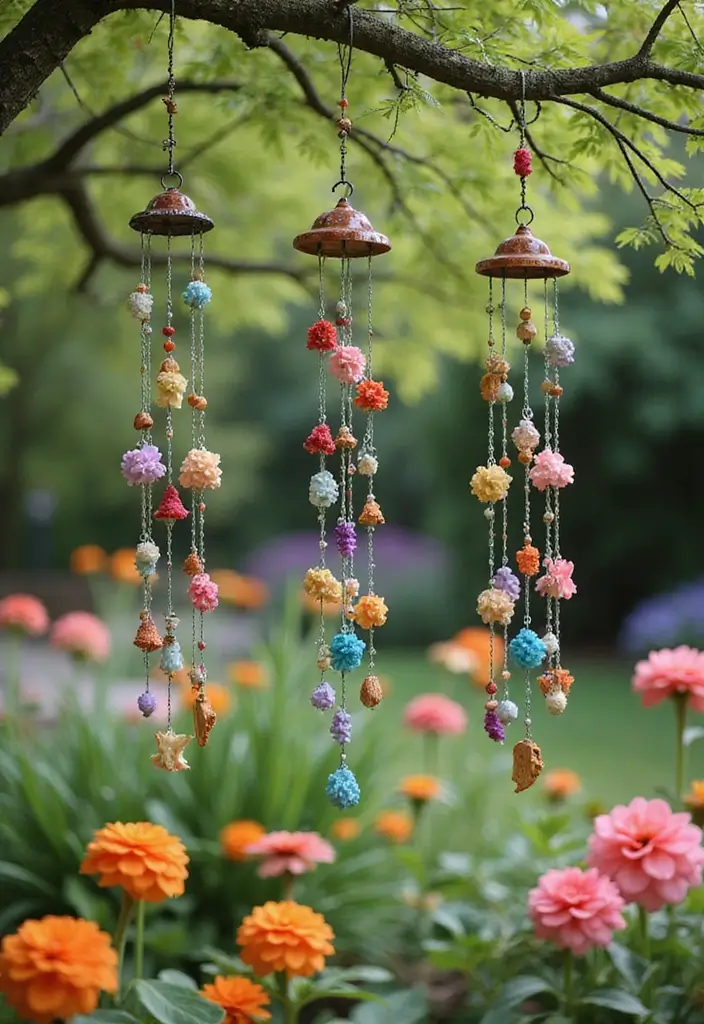
Bring a delightful tune to your fairy garden with whimsical wind chimes! These enchanting accessories not only catch the eye but also fill the air with soft, melodic sounds. You can easily craft them using colorful beads, seashells, or tiny metal pieces. String them together with twine or fishing line, then hang them from tree branches or garden arches. Imagine the gentle chimes dancing in the breeze, creating a magical atmosphere that draws you in.
You can find inspiration for your wind chimes on platforms like Pinterest, where DIY projects are a hit. Trending designs include chimes made from recycled materials like old silverware or glass bottles, giving your garden a unique touch without breaking the bank. These charming pieces enhance the beauty of your space, making it feel inviting and serene.
To make your wind chimes, follow these simple steps:
• Choose colorful beads or shells for visual appeal
• Use twine or fishing line for durability
• Hang chimes where they can catch the wind
• Experiment with different materials for varied sounds
With these tips, you’ll create a lovely musical feature that complements your fairy garden. The gentle tinkling of your handmade wind chimes will bring joy and a sense of calm, making your outdoor space a true retreat. Enjoy the process and let your creativity shine as you add this enchanting element to your garden!
19. Mini Fairy Observatory
Create a magical spot in your fairy garden with a mini fairy observatory! This enchanting addition allows your tiny friends to gaze at the stars and dream big. You can build an observatory using small wooden boxes or even recycled cardboard. Paint it in deep blues or rich purples to mimic the night sky. Decorate the exterior with glittery stars and moon cutouts to make it shine.
Inside, add tiny telescopes made from rolled paper or colorful beads. This little touch encourages curiosity and adventure in your fairy world. You’ll find that many DIY enthusiasts on Pinterest are loving these observatories, making them a popular trend this season.
To implement your mini observatory, start by gathering materials from around your home. Look for old shoe boxes or wooden scraps that you can repurpose. If you want to keep costs down, visit a local craft store for affordable paints and embellishments. This project not only enhances your fairy garden but also ties in beautifully with themes like whimsical or rustic designs.
Imagine how lovely it feels to have a space that inspires exploration and wonder. Your fairy garden will come to life, inviting you and others to share in its magic.
• Use small boxes or wood scraps for construction
• Paint in dark colors to resemble the night sky
• Decorate with stars and moon cutouts for charm
• Add tiny telescopes made from rolled paper or beads
20. Tiny Garden Workshop
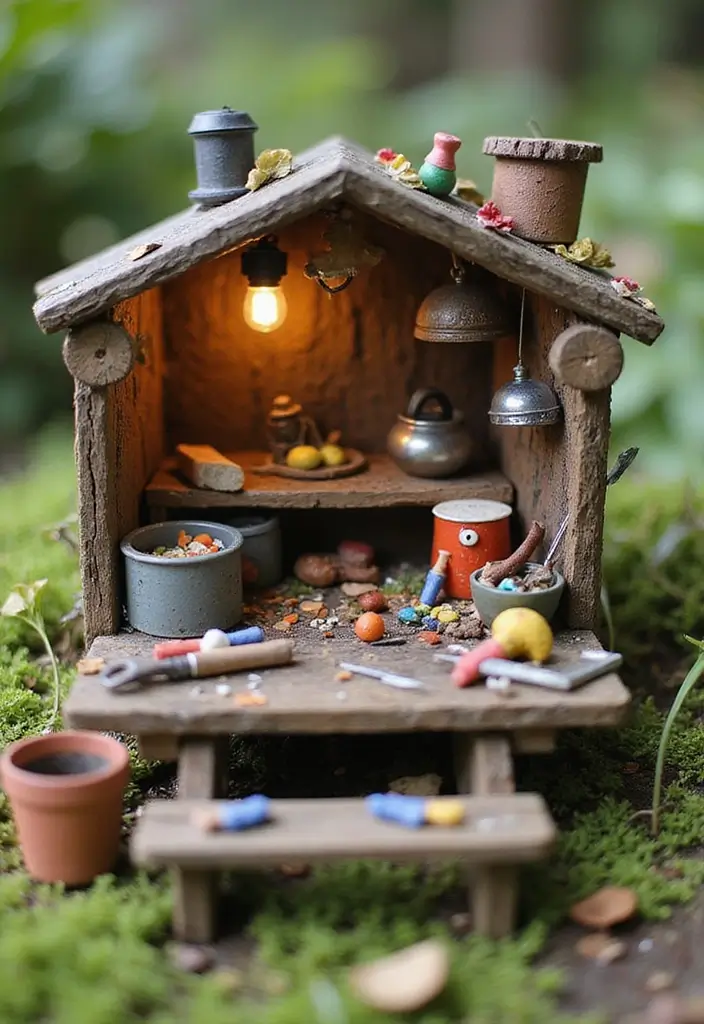
Create a charming Tiny Garden Workshop that every fairy would love! This little space allows your imagination to run wild as you envision fairies crafting their magical items. Start by building the structure with simple materials like popsicle sticks or small pieces of cardboard. Paint them in soft pastel colors, like mint green or sky blue, to make the workshop feel welcoming and whimsical. You can find inspiration for designs on Pinterest, where you’ll see many enchanting setups that can spark your creativity.
To bring your workshop to life, fill it with tiny tools and materials. You can make these from clay or use beads for a unique touch. Hang miniature tools on hooks or create tiny shelves to display your crafted items. You might even want to add a small sign that reads “Fairy Workshop” to give it that personal touch. Remember, a well-decorated workshop not only adds to your fairy garden but also tells a story, making it a delightful spot for visitors to explore.
Here are some fun tips to enhance your Tiny Garden Workshop:
Use colorful beads to create tiny tools.
Choose popsicle sticks or cardboard for the structure.
Add a small sign for a personal touch.
Place the workshop in a sunny spot to brighten the space.
This workshop will become a focal point in your fairy garden, inspiring stories and sparking joy. It’s a fantastic project that encourages creativity and a sense of wonder, making your garden feel truly magical. Enjoy the process of building, decorating, and imagining the delightful fairies that will inhabit your creation!
21. Fairy Garden Observatory
Imagine creating a whimsical observatory for your fairies, a perfect spot for them to gaze at the stars and dream of adventures. This enchanting addition can be made from simple materials like clay or paper for the dome and a sturdy base. Paint it with bright colors and sprinkle some glitter for that magical touch. You can even add tiny windows made from mesh or clear plastic to give it a realistic feel.
Pinterest is buzzing with ideas for fairy-themed decor, and a fairy observatory fits right in with current trends. It’s an easy DIY project that sparks creativity and adds charm to your garden. This cozy nook not only serves as a lookout point but also inspires stories and imaginative play. Your fairies will love their little hideaway!
Now, let’s talk about how to make this idea a reality. You don’t need to spend a fortune. Gather supplies from around your home or visit a craft store for affordable options. Look for recycled materials like boxes or leftover paint. Building your observatory can be a fun weekend project with your kids or friends, turning it into a memorable bonding experience.
This addition makes your fairy garden feel more complete and inviting, perfect for storytelling and playtime.
• Use clay or paper for a charming dome
• Paint in bright colors for a magical look
• Add mesh windows for realism
• Include a globe or map for an explorer vibe
22. Fairy Garden Bird Bath
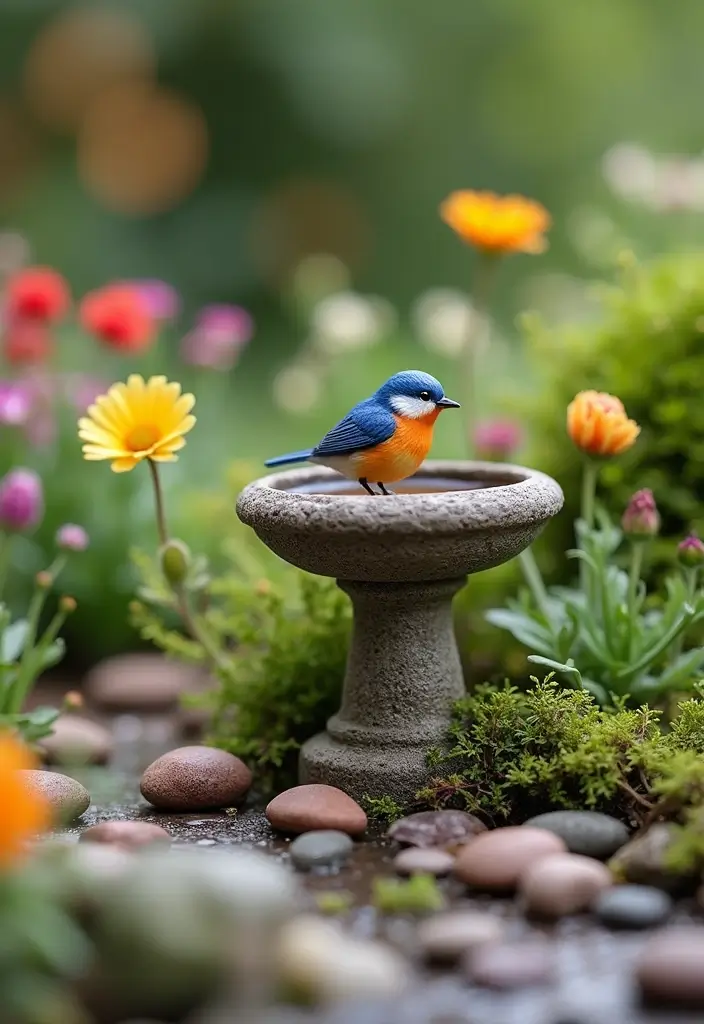
Create a charming retreat for your fairies with a delightful bird bath in your garden. This whimsical addition not only provides a refreshing spot for your fairy friends but also invites real-life birds and butterflies to join the fun. You can easily make a bird bath by using a shallow dish placed on a sturdy pedestal. Consider using stones, bricks, or even a small piece of wood for the base.
Go for vibrant colors when selecting your dish, like bright blue or sunny yellow. Surround it with colorful pebbles or tiny garden ornaments to enhance its appeal—trends on Pinterest show that these details capture attention beautifully. Such a lovely feature can become the heart of your fairy garden, making it a magical space for all who visit.
To bring your fairy bird bath to life, here are some easy steps to follow. Find a shallow dish that fits your theme. Place it on a solid pedestal, ensuring it’s stable. You can use affordable materials like stones or even repurpose an old wooden block.
Add small plants around the bath to attract butterflies and other creatures, creating a lively habitat. This setup not only beautifies your garden but also brings joy and tranquility. Imagine watching the butterflies fluttering around, making your garden feel like a vibrant oasis.
• Use a shallow dish for the bird bath to ensure easy access for birds.
• Choose colorful pebbles to decorate the area around the bath.
• Place tiny plants nearby to foster a natural habitat for wildlife.
• Incorporate unique stones in the water for an artsy look.
This bird bath will surely become a focal point in your fairy garden, inviting nature and inspiring delight for everyone who sees it.
23. Miniature Fairy Garden Farm
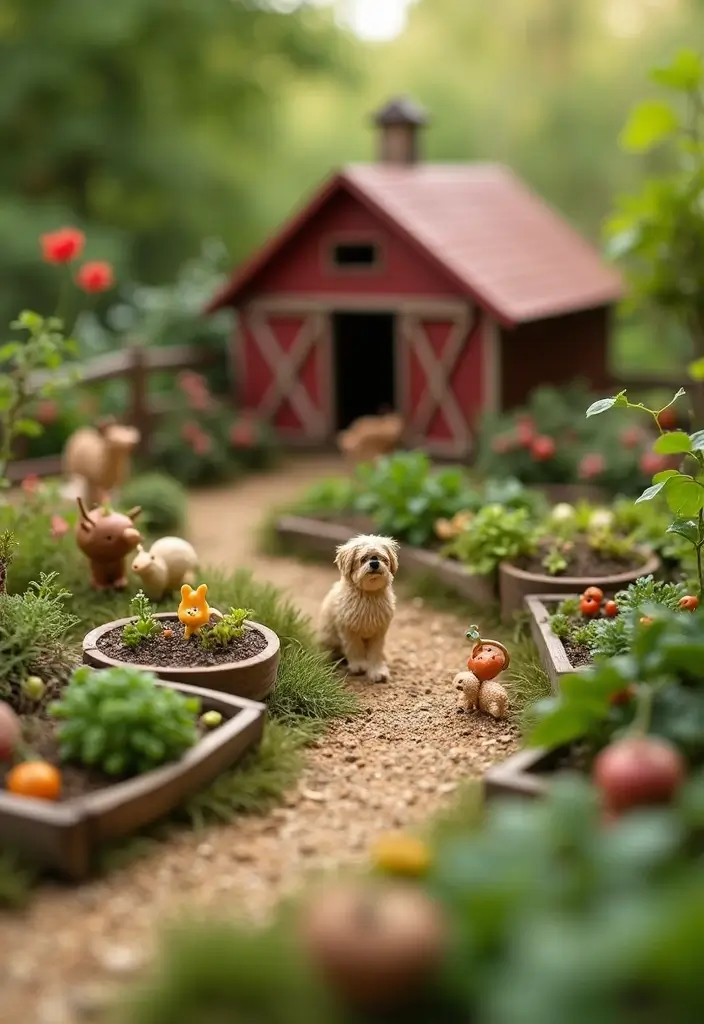
Create a delightful miniature fairy garden farm that will spark joy and creativity! Picture tiny animals frolicking in a vibrant setting. You can easily sculpt adorable animal figures using colorful clay or find ready-made miniature farm animals online. For the barn, consider using wood or even sturdy cardboard. Paint it bright red or classic white to give it that charming rustic look. Decorate with little hay bales made from dried grass or paper to enhance the farm vibe. As seen on Pinterest, these tiny touches add a whimsical feel to your fairy garden.
To bring your fairy farm to life, start by laying out a small plot. Use natural materials like stones or painted pebbles to create quaint vegetable patches. You can also add a tiny fence around the farm to give it a cozy, enclosed feel. This fence can be made from twigs or popsicle sticks, making it both affordable and fun to create. You’ll find that incorporating these elements not only boosts the charm but also encourages imaginative play, making your fairy garden a magical retreat.
• Use colorful clay to make tiny animal figures
• Choose a bright color for your barn, like red or white
• Add dried grass or paper as hay bales
• Create a fence using twigs or popsicle sticks
With these simple steps, your miniature fairy garden farm will become a lovely centerpiece, perfect for sparking the imagination of both children and adults alike.
24. Fairy Garden Treehouse
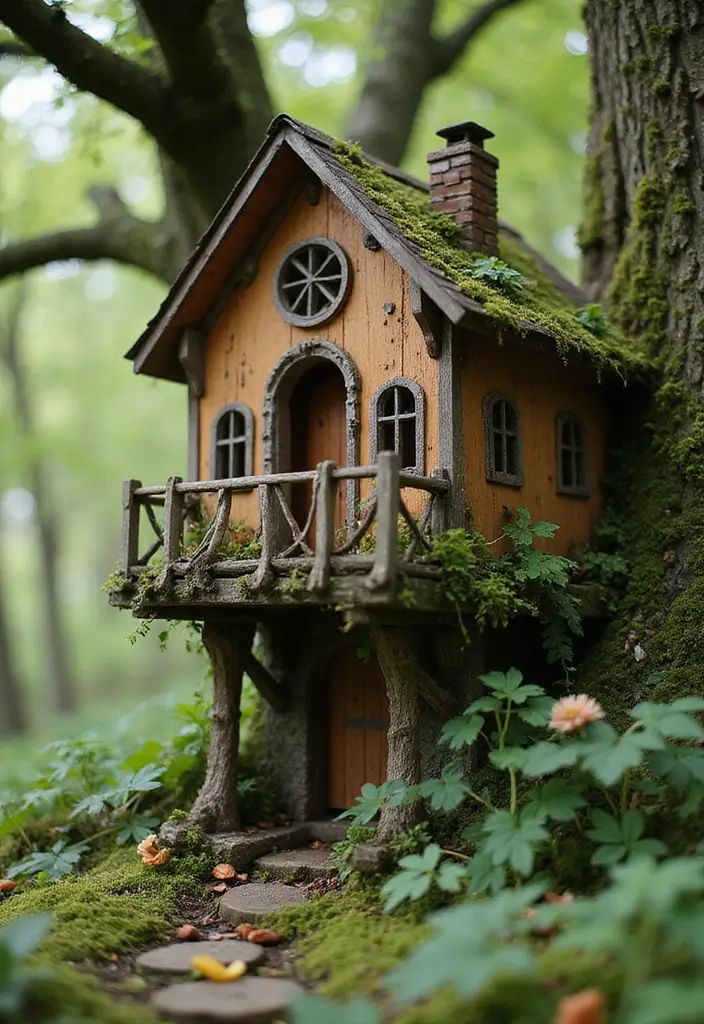
Create a magical retreat for your fairies with a charming treehouse! This delightful addition not only adds a whimsical touch but also sparks your creativity. You can build it using small wooden blocks or craft sticks. Choose natural colors like browns and greens to help it blend beautifully with the trees. Pinterest users love the idea of hanging tiny flower pots or leaves around the house, making it feel like a cozy home in the treetops.
To get started, find a sturdy branch that can support your treehouse. Securely attach the structure to prevent it from wobbling. You can also craft a miniature ladder from twigs. This adds a playful element and allows your fairies to climb up and down easily. For a truly enchanting experience, hang tiny lanterns from the surrounding branches. They light up the night and create a perfect backdrop for imaginative fairy tales.
Here are some practical tips to bring your fairy treehouse to life:
Use small wooden pieces or craft sticks for a sturdy build.
Choose natural hues like greens and browns for a seamless look.
Add small flower pots or leaves for extra charm.
Place tiny lanterns around for magical nighttime glow.
With these steps, you’ll create a fairy treehouse that invites joy and wonder, making your garden feel like a special place for storytelling and adventure.
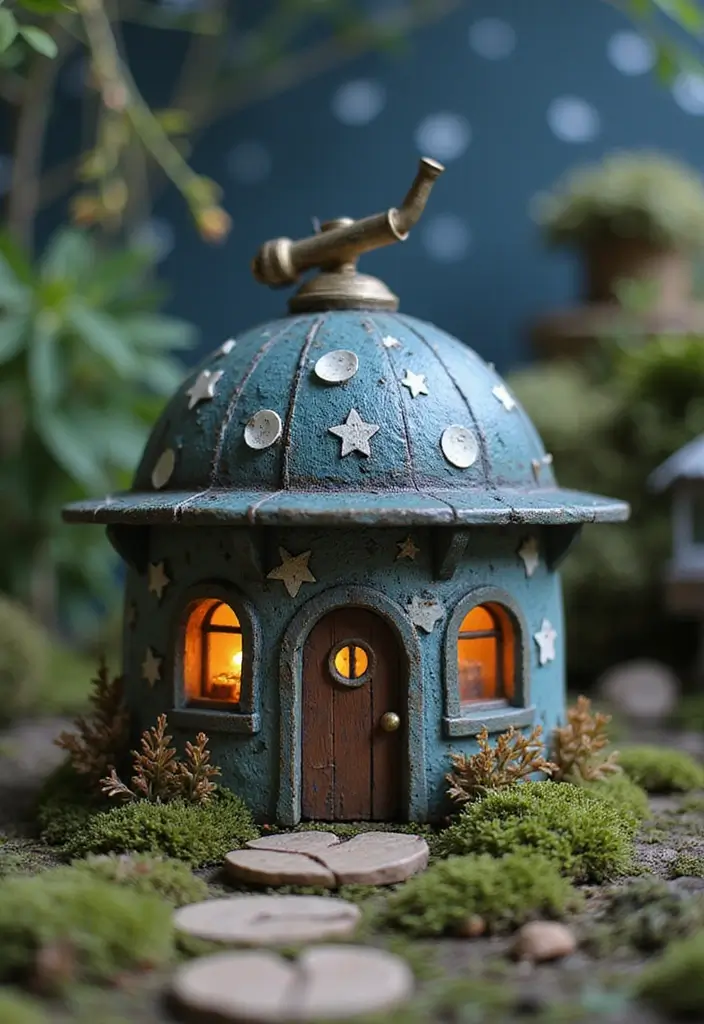
25. Fairy Garden Observatory
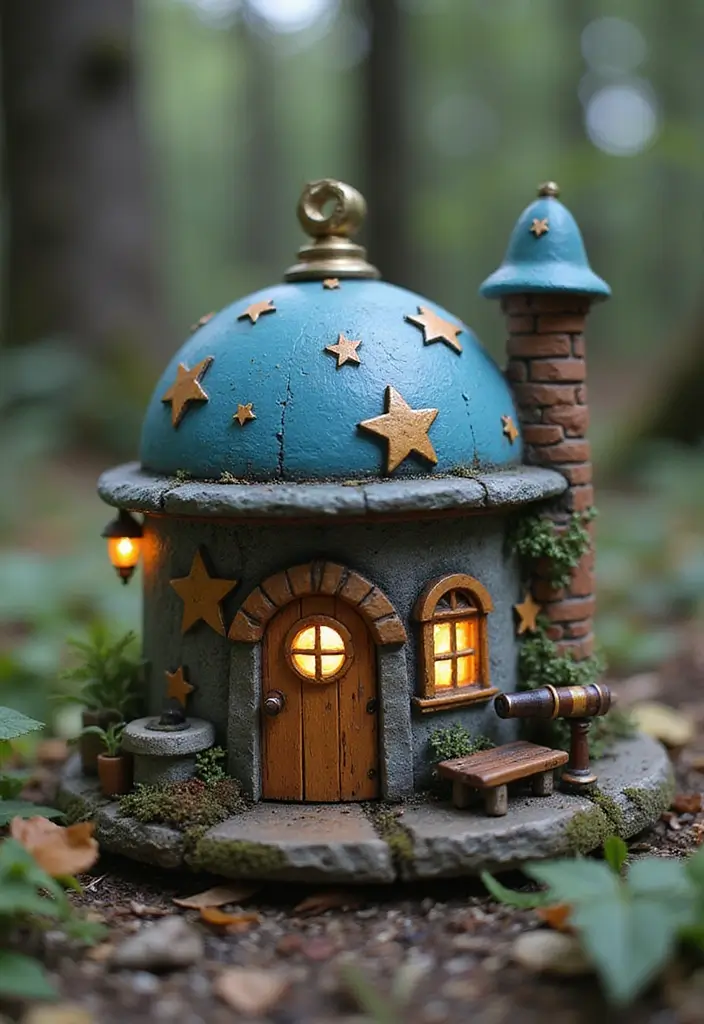
Create a magical spot in your fairy garden with a charming fairy observatory! This little hideaway invites fairies to gaze up at the stars and dream big. Use a small, round container as the base. Paint it with dark blues and purples for a night sky effect. Add shimmering stars and constellations with glitter or metallic paint. This design is trending on platforms like Pinterest, where fairy garden enthusiasts showcase their whimsical creations.
To make your observatory even more special, craft a tiny telescope from rolled-up paper. You could also use a straw for a more sturdy option. This interactive element encourages imagination and adventure. Don’t forget to include tiny seating made from leaves or acorns. It creates a cozy spot for fairies to sit and stargaze, making your garden feel even more enchanting. This delightful addition captures the spirit of exploration and wonder.
Here are some tips to help you bring your fairy observatory to life:
Use a round container painted in dark colors for a night sky effect.
Create a telescope with rolled paper or a straw for sturdiness.
Add seating made from leaves or acorns for comfort.
Decorate with glitter or metallic paint to mimic stars.
Building a fairy observatory is an affordable project that sparks creativity. It adds a cozy touch to your garden, inviting visitors—both human and fairy—to enjoy a night under the stars. This little creation makes your garden feel even more magical, perfect for inspiring stories and adventures. Let your imagination shine as you design this enchanting space!
Conclusion

Crafting fairy garden accessories can be a joyful and fulfilling experience!
By incorporating these whimsical elements, you’ll create a captivating outdoor space that invites creativity and imagination. From tiny seating areas to charming pathways, each DIY creation adds a personal touch that enchants both young and old.
So gather your supplies and start building your own magical retreat today, adding your unique flair to the world of fairy gardening!
Frequently Asked Questions
What are some easy DIY fairy garden accessories I can make?
Creating your own fairy garden accessories can be a delightful experience! Start with simple projects like miniature garden furniture, which can include tiny benches and tables made from twigs or popsicle sticks. You can also craft whimsical decorations like painted rocks or tiny fairy houses using recycled materials. The key is to let your imagination run wild while using items you already have at home!
Where can I find inspiration for DIY fairy garden ideas?
Inspiration for DIY fairy garden ideas can be found all around you! Check out gardening blogs, Pinterest boards, and Instagram hashtags dedicated to miniature garden decor. Local gardening stores often have displays that showcase creative setups. Don’t forget to visit nature; the outdoors can inspire you with unique materials like stones, leaves, and moss that are perfect for your garden craft projects.
What materials do I need for making whimsical garden accessories?
When making whimsical garden accessories, you’ll need a variety of materials! Gather items like wooden sticks, stones, twine, paint, and glue. You can also use recycled items such as bottle caps and old toys to add charm to your creations. Make sure to include some natural elements like moss and small plants to really bring your fairy garden to life!
How can I maintain my DIY fairy garden outdoors?
Maintaining your DIY fairy garden outdoors can be simple and rewarding! Regularly check for weeds and remove them to keep your garden looking tidy. Water your plants as needed, and consider using a small spray bottle for delicate areas. If you notice any accessories fading in color, feel free to refresh them with a new coat of paint. Lastly, reposition your garden to ensure it gets the right amount of sunlight throughout the day!
Are there any specific plants that work well in a fairy garden?
Absolutely! When selecting plants for your fairy garden, consider using small and slow-growing varieties. Some popular choices include miniature succulents, creeping thyme, and dwarf ferns. These plants not only fit the scale of your garden but also thrive in compact spaces. Make sure to choose plants that match your local climate and provide the right care, so your fairy garden remains enchanting all year round!