
Spring is here, and with it comes the urge to breathe new life into your outdoor spaces. If you’re like me, you crave a garden that feels inviting and reflects your unique personality. That’s why I’ve gathered a collection of 30 garden crafts and DIY yard art ideas to help you transform your garden into a lively, colorful oasis.
This post is for anyone who loves gardening or simply wants to add a personal touch to their outdoor area. Whether you’re a seasoned gardener or just starting out, you’ll find plenty of inspiration here. You care about making your space feel like home, and these projects will help you do just that.
In this roundup, you’ll discover fun, creative projects that are easy to tackle. From charming decorations to functional pieces, these ideas will bring character to your garden. Plus, they’re affordable! You’ll get step-by-step instructions and tips, so you can dive right in.
So grab your tools and get ready to unleash your creativity. Let’s make your garden not just a place to grow plants, but a vibrant expression of who you are!
1. Bottle Flower Garden Stakes

Transforming old plastic bottles into charming flower garden stakes is a fun way to breathe new life into your garden. These colorful creations bring joy and personality to any outdoor space. Use bright acrylic paints to decorate the bottles in shades that pop against your greenery. Imagine a sunny yellow bottle next to lush green leaves or a bold pink bottle standing out against rich soil. You’ll find inspiration for this project all over Pinterest, where DIY enthusiasts showcase their vibrant designs.
To get started, cut the bottom off each bottle to create a flower shape. After painting, let them dry completely. Then, poke a hole in the center and attach a sturdy stick or dowel. You can place these flower stakes throughout your garden for a playful touch. This project is not only budget-friendly but also a great way to recycle materials. Plus, having these whimsical flowers scattered around makes your garden feel more inviting and cheerful.
Here are some tips to help you create the perfect bottle flower garden stakes:
• Choose bright colors that enhance your garden’s existing palette.
• Mix different bottle sizes to add depth and interest.
• Secure the stakes firmly in the ground to withstand wind.
• Experiment with shapes by cutting the bottles in various styles for unique designs.
These delightful stakes are perfect for adding a splash of creativity to your outdoor oasis. They invite smiles and spark conversations, making your garden a welcoming retreat for family and friends. Get your craft supplies ready and let your creativity bloom!
2. Painted Rock Garden Markers

Brighten up your garden with painted rock garden markers. These charming accents not only label your plants but also add a splash of creativity to your outdoor space. Imagine colorful rocks adorned with the names of your favorite herbs and flowers, each one telling a story. As seen on Pinterest, these DIY markers are a fun way to express your personality while staying eco-friendly.
To create your garden markers, start by collecting smooth rocks from your yard or a nearby riverbank. Clean them well, removing any dirt and debris. Then, grab some acrylic paints in bright colors to make your designs pop. You can paint not only the names of your plants but also little faces or fun patterns. After your artwork dries, seal each rock with a clear varnish to protect your masterpiece from rain and sun.
This project is budget-friendly, making it a perfect weekend activity. You’ll enjoy the satisfaction of creating something unique that enhances your garden’s charm. Plus, it’s a wonderful way to get kids involved. They’ll love painting their markers and learning about the plants they’re helping to label.
Here are some tips to make your painted rock garden markers even better:
Choose rocks that are flat and large enough for easy writing.
Paint both sides to ensure visibility from any angle.
Use weather-resistant paint for durability against the elements.
Get creative with designs – think flowers, animals, or whimsical patterns!
Adding these delightful markers to your garden will not only help you identify your plants but also create a warm and inviting atmosphere. Embrace your artistic side and watch your garden bloom with personality!
3. Upcycled Tin Can Lanterns
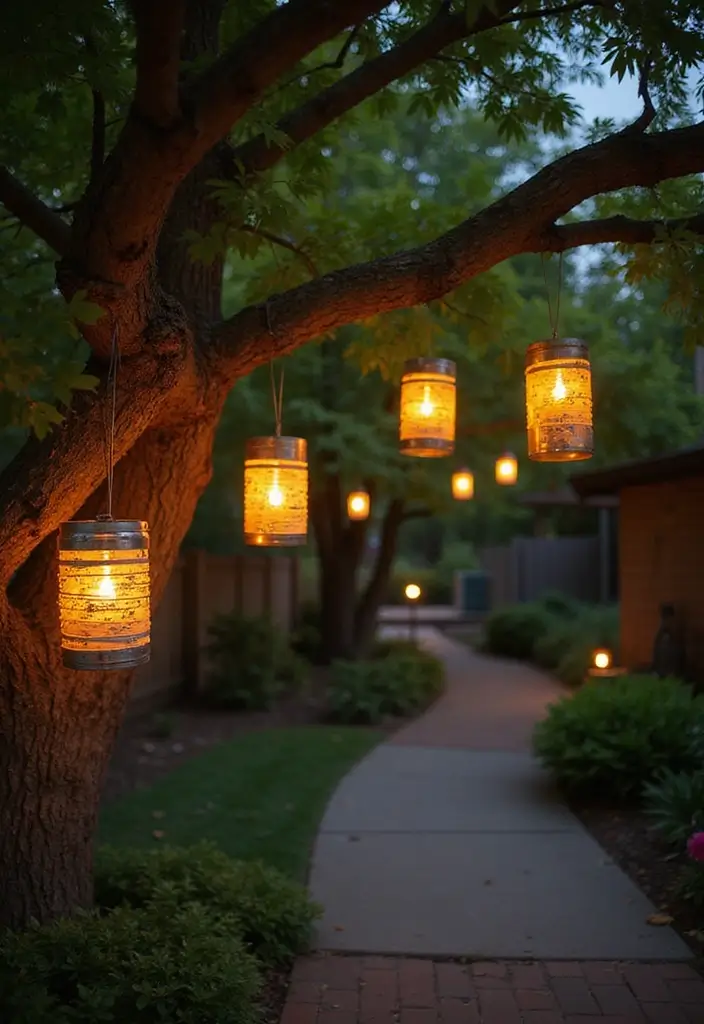
Brighten up your garden with delightful upcycled tin can lanterns! These charming lights are easy to create and add a whimsical touch to your outdoor space. As the sun sets, these lanterns cast a magical glow, making your garden feel like a cozy evening retreat.
To make your own lanterns, start by collecting empty tin cans. Fill each can with water and freeze them overnight. When the water is solid, carefully remove the can from the freezer. Use a hammer and a small nail to punch holes in the can, creating fun patterns—think stars, hearts, or flowers! Once you’re done, peel away the ice, paint the outside in your favorite colors, and place a tea light inside. Hang them from tree branches or line your pathways for that enchanting twinkle.
These lanterns are budget-friendly and sustainable, making them a fantastic project for anyone. You can find cans at home or ask your friends to save theirs. This DIY project aligns well with a rustic or bohemian garden style, adding character without spending much. Plus, there’s something so satisfying about crafting something beautiful from materials that might have been tossed away.
Here are some tips to enhance your tin can lanterns:
Use various can sizes to create a fun display.
Choose bright colors or metallic paints for a striking effect.
Pick unique patterns that reflect your personality.
Add battery-operated tea lights for safer use, especially in windy areas.
Let your creativity shine and enjoy your beautifully lit garden!
4. Whimsical Garden Gnomes

Bring a touch of whimsy to your garden with charming DIY garden gnomes. These delightful figures can transform your outdoor space, adding personality and cheer. You can create them using everyday items like old bottles, mismatched socks, or even garden tools. Imagine a bright blue gnome with a patchwork hat made from fabric scraps, standing proudly among your flowers. As seen on Pinterest, these quirky creations are trending in garden decor, making your yard feel playful and inviting.
Start your gnome-making adventure by choosing a sturdy base. A large plastic bottle or a smooth rock works great. Once you have your foundation, let your creativity shine! Paint your gnome in vibrant colors, add buttons for eyes, and use fabric or yarn for hats. Remember, each gnome can reflect your unique style and the vibe of your garden.
To keep your gnomes looking fresh, consider using weather-resistant materials. This way, they can withstand the elements and bring joy all year round. Plus, gathering friends for a gnome-making party can turn this craft into a fun social event, where everyone can express their creativity.
Here are some tips to make your garden gnomes stand out:
Use recycled materials for an eco-friendly touch.
Choose bold colors to brighten your garden.
Pick spots around your yard that need personality.
Add unique features like hats or props to personalize each gnome.
Get ready to enjoy your garden like never before with these charming little guardians! They’ll not only enhance your garden’s aesthetics but also bring smiles to everyone who visits.
5. Mosaic Stepping Stones
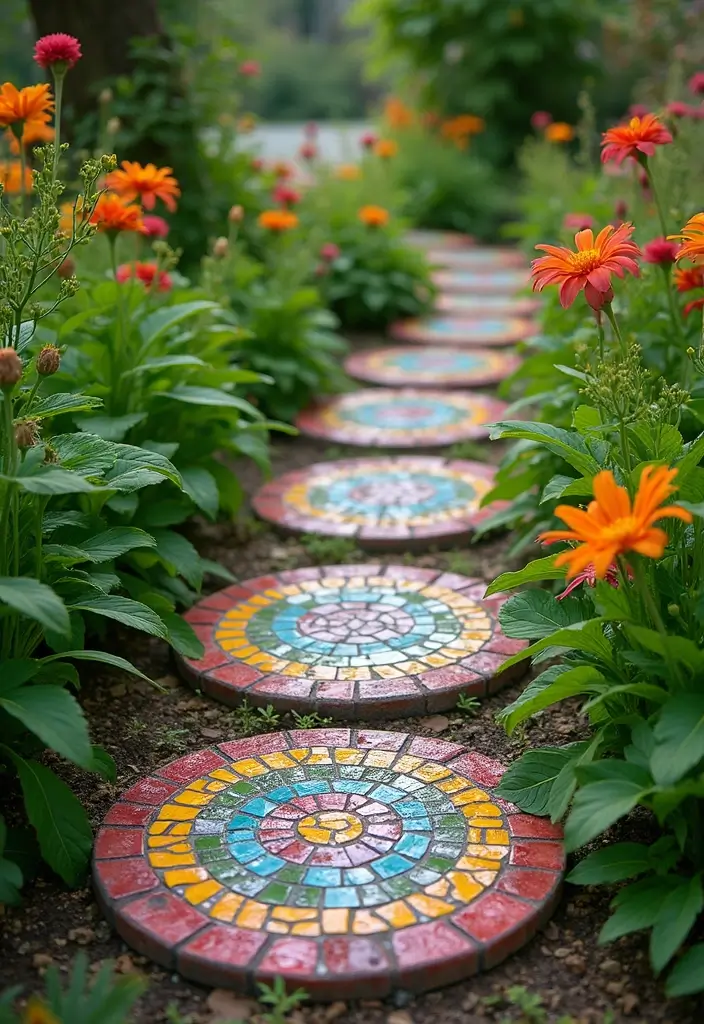
Create stunning mosaic stepping stones to add flair and charm to your garden. Not only do they create a pathway, but they also turn your yard into an art gallery. Picture colorful tiles, shiny glass pieces, or even fragments of old dishes, all coming together to reflect your unique style. These creations are trending on Pinterest and can truly personalize your outdoor space.
To get started, mix concrete and pour it into molds. While the mixture is wet, place your mosaic pieces in your chosen design. Let them set, and soon, you’ll have a beautiful pathway that showcases your creativity. These stones not only guide guests but also brighten up your garden with their artistic touch.
You don’t need a hefty budget to create these stepping stones. Look for broken tiles or thrifted dishes at local shops. This DIY project allows you to express your style without breaking the bank. Plus, it’s a great way to recycle materials! Imagine walking through a garden filled with your personal touches; it makes the space inviting and warm.
• Choose bold colors that contrast beautifully with your plants.
• Personalize with initials, dates, or fun shapes.
• Arrange them in a whimsical path for a playful look.
• Use recycled materials to keep costs low and add character.
6. Repurposed Window Frame Trellis
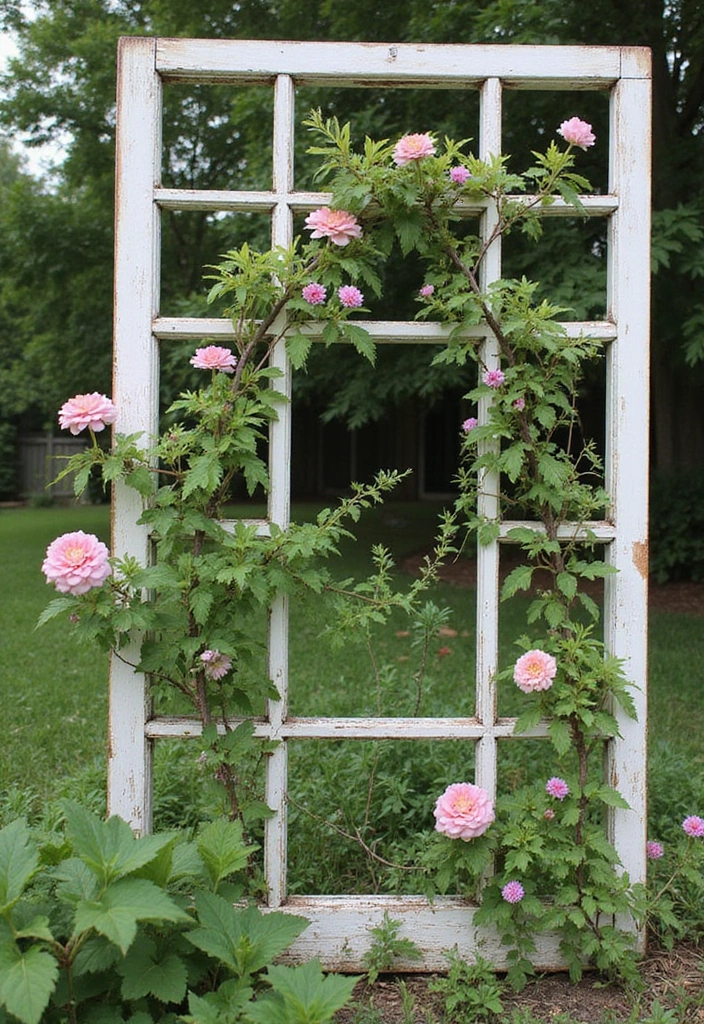
Give your garden a unique touch with a repurposed window frame trellis! This creative project not only saves an old item from the landfill but also offers a stunning structure for your climbing plants. Imagine vibrant vines or fragrant roses winding up the frame, creating a beautiful focal point in your yard.
To start, find an old window frame that resonates with your garden’s style. Paint it in colors that complement your plants and overall decor. Earthy greens or soft pastels are popular choices. Secure it against a wall or fence to ensure stability. Pinterest is full of ideas on how to customize your trellis, making it a trendy addition to your space!
When putting this project together, aim for an affordable approach. Scour thrift stores or garage sales for frames that may just need a little TLC. This DIY project not only enhances your garden’s character but also aligns with eco-friendly design principles. Your trellis will be a conversation starter, making your garden feel inviting and personal.
• Choose a frame that matches your garden’s color palette.
• Secure the frame well to withstand wind and plant weight.
• Add hanging pots or decorative accents for extra charm.
• Paint it in colors that pop or blend in with nature.
7. Tin Can Planters
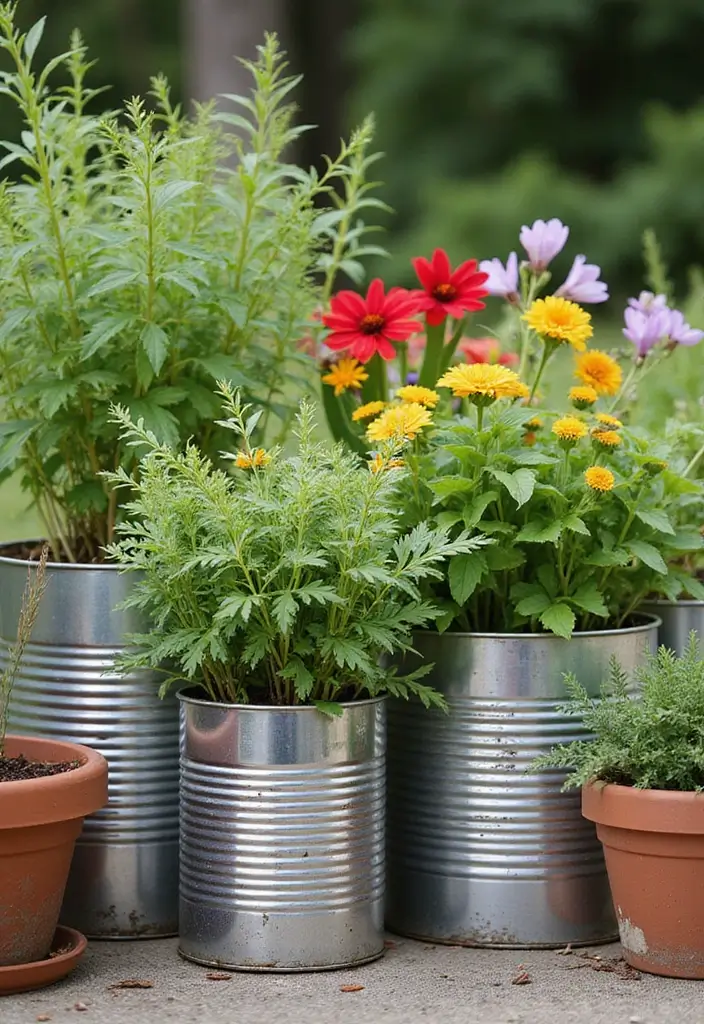
Give your garden a unique twist with tin can planters. These simple projects can add a rustic charm that enhances your outdoor space. Imagine colorful herbs and flowers peeking out from repurposed cans. You can use bright paints or fun fabric to decorate them, making them as vibrant as your garden. This trendy DIY has caught the eye of many on platforms like Pinterest, inspiring countless gardeners to get creative.
To create your own tin can planters, start by rinsing out any leftover food from the cans. Next, use a hammer and a nail to punch a few small holes in the bottom for drainage. Fill each can with potting soil, and then plant your favorite herbs or flowers. Hang them on a sunny wall or line them up on a windowsill for a cheerful display. Plus, this project won’t break the bank, as it uses materials you might already have at home.
Here’s how to make the most of your tin can planters:
Use different sizes for a playful look.
Choose bright colors to add energy to your space.
Pick herbs like basil or mint for practical beauty.
Place them where they’ll get plenty of sunlight.
With these tips, your garden will feel more inviting and full of personality. Enjoy the satisfaction of creating something beautiful from everyday items!
8. Recycled Pallet Vertical Garden

Elevate your outdoor space with a Recycled Pallet Vertical Garden! This DIY project not only saves space but also brings a unique flair to your garden. Imagine a wooden pallet, transformed into a lush, green display. Choose a pallet that’s sturdy enough to hold soil and plants. You can leave it as is for a rustic vibe or paint it in vibrant colors to match your garden’s theme. Pinterest is buzzing with these ideas, showcasing how creative you can get!
To get started, grab a well-built pallet and give it a good sanding to prevent splinters. Next, set it in a sunny spot, leaning it against a wall or fence. Fill the slots with potting soil, then plant your favorite flowers or herbs. This garden style isn’t just visually appealing; it’s also budget-friendly! You can often find pallets for free or at a low cost. Imagine stepping outside to the fresh scents of herbs and colorful blooms, making your garden feel welcoming and alive.
• Choose a strong pallet for stability and durability.
• Fill each slot with quality potting soil for healthier plants.
• Mix herbs and flowers for beauty and fragrance.
• Position it in sunlight to ensure your plants thrive.
Now you have a lovely vertical garden that will impress guests and brighten your outdoor area. Enjoy the creative process and watch your garden come to life!
9. Upcycled Chair Planters

Breathe new life into your garden by turning old chairs into charming planters! This creative project adds a whimsical touch while giving your plants a unique home. Imagine a vibrant, painted chair bursting with colorful flowers or a rustic wooden seat cradling lush herbs. Pinterest is buzzing with ideas for these quirky planters, making them a hot trend in backyard decor.
Start by taking an old wooden chair and carefully removing the seat. Fill the empty space with potting soil, then plant your favorite flowers or a small herb garden. You can choose bold, cheerful colors to paint the chair or leave it in its natural, weathered state for a vintage vibe. This simple transformation can make your garden feel inviting and full of character.
When creating your upcycled chair planter, consider these practical tips:
– Choose mismatched chairs for a playful, eclectic display that tells a story.
– Position your chair in a sunny spot where it can be a focal point.
– Add decorative elements like hanging ornaments or fairy lights to enhance its charm.
– Use affordable paint to give your chair a fresh look without breaking the bank.
By integrating these fun ideas, your garden will not only look beautiful but also feel personal and unique, perfect for relaxing on sunny days or entertaining friends.
• Select vibrant colors to brighten up your garden
• Position chairs in sunny spots for optimal plant growth
• Incorporate fairy lights for a magical evening atmosphere
• Repurpose various styles of chairs for an eclectic touch
10. Garden Tool Wind Chimes

Bring a delightful sound to your garden with charming garden tool wind chimes! This DIY project not only recycles old tools but also adds a unique touch to your outdoor space. Imagine the gentle melodies of your old spades and trowels dancing in the breeze, creating a soothing atmosphere.
Start by gathering old garden tools like spades, trowels, or forks. Give them a good clean to prepare for their new role. You can hang these tools from a sturdy branch or create a metal frame for a more structured look. Look for tools with interesting shapes or colors to elevate their visual appeal. Pinterest is filled with inspiring designs showcasing colorful and whimsical wind chimes that can transform any garden.
To make this project budget-friendly, check out local thrift stores or garage sales for old tools. You don’t need to buy new items to create something beautiful! Hang the tools at varying lengths to create a pleasing sound range. You can also paint them in bright colors to add a pop of fun. These wind chimes are perfect for welcoming guests and providing a cheerful ambiance in your yard.
• Choose tools with unique shapes for visual interest.
• Hang at different lengths for varied sounds.
• Paint tools in bright colors for a whimsical touch.
• Use twine or fishing line for secure hanging.
Create your own musical garden with this easy and rewarding project. You’ll love how these wind chimes bring life and personality to your outdoor space!
11. Colorful Tire Planters

Brighten your garden with colorful tire planters! These unique additions not only recycle old tires but also bring a joyful vibe to your outdoor space. Picture vibrant reds, cheerful yellows, and calming blues stacked or arranged in fun patterns. You can easily find inspiration on platforms like Pinterest, where many DIY enthusiasts showcase their creative designs.
To start, clean the tires thoroughly to remove dirt and debris. Then, grab some outdoor paint and let your creativity flow. Consider using a mix of sizes for a more dynamic look. Fill the tires with rich soil and plant your favorite herbs, flowers, or even small shrubs. This creates a functional and eye-catching display that can brighten up any garden corner.
Here are some practical tips to help you with your tire planter project. First, ensure your tires have proper drainage by drilling holes in the bottom. This prevents water from pooling and keeps your plants healthy. Second, think about pairing your colorful tires with a base of gravel or mulch. This adds a polished touch and helps keep weeds at bay. Plus, it makes maintenance easier!
• Choose bright, outdoor-safe paint for durability
• Fill with soil and plant vibrant flowers or herbs
• Drill drainage holes to keep plants healthy
• Add gravel or mulch for a tidy finish
With these tips, you can create a garden that feels lively and uniquely yours. Tire planters are not just practical; they make your outdoor space feel welcoming and full of personality.
12. Painted Birdhouses

Brighten up your garden and invite feathered friends with charming painted birdhouses! This fun DIY project combines creativity with a love for nature. Imagine colorful birdhouses perched among your trees, each one a little work of art that reflects your style.
Start by gathering untreated wood or repurpose old wooden boxes. Use your favorite bright colors or intricate patterns to make each birdhouse unique. Pinterest is full of inspiration, showcasing everything from whimsical fairy tale themes to serene beachy vibes. These vibrant additions not only enhance your garden’s appeal but also provide a safe haven for local birds.
To get started, consider these practical tips. Build your birdhouses on a budget by using materials you already have or finding items at thrift stores. Choose non-toxic paints to keep the birds safe. This way, you can decorate without worry. Remember, a well-placed birdhouse can transform your garden into a lively retreat, making it a perfect spot for relaxation and birdwatching.
• Use untreated wood for safe and durable birdhouses.
• Choose non-toxic paints to protect your feathered friends.
• Add unique decorations like stones or shells for extra flair.
• Place birdhouses in trees or on poles to attract birds easily.
Incorporating painted birdhouses into your garden not only showcases your artistic flair but also creates a welcoming environment for wildlife. Get creative and enjoy the beauty around you!
13. DIY Garden Signpost
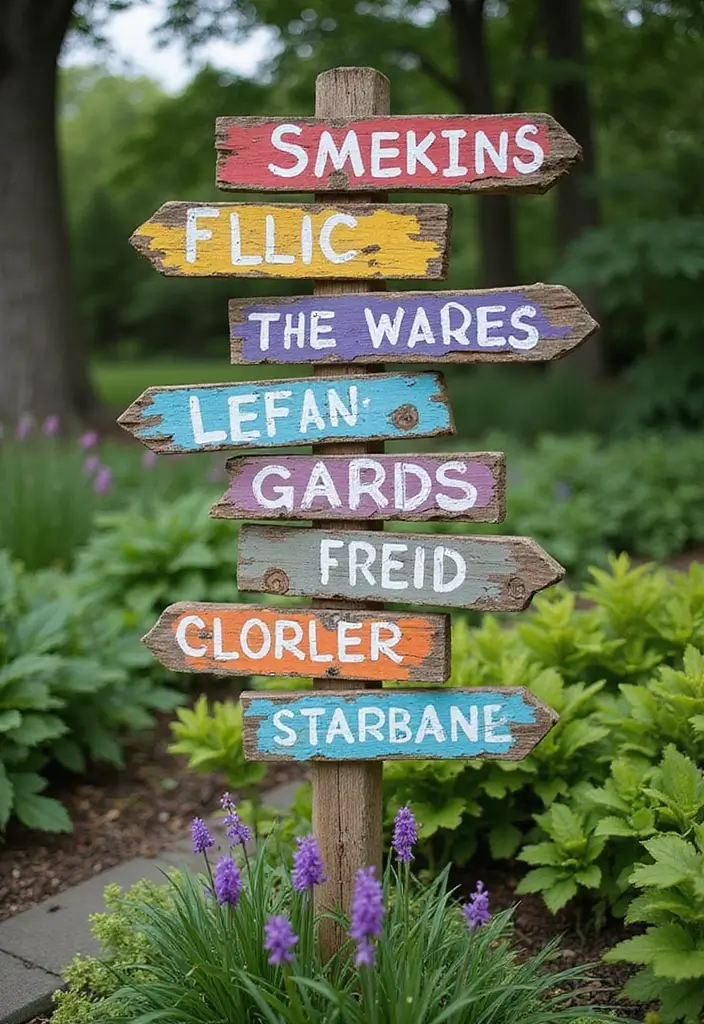
Create a welcoming atmosphere in your garden with a charming DIY garden signpost. This playful project not only guides visitors but also adds a splash of personality. Imagine colorful signs pointing the way to your favorite plants or even to a cozy seating area. Using reclaimed wood gives your signpost a rustic touch that’s on-trend and eco-friendly. Vibrant colors or natural stains can make the signs pop against your greenery, creating a visual delight.
To bring your garden signpost to life, start by collecting old wooden planks. Cut them into various shapes like arrows or quirky designs. Label each sign with plant names, fun quotes, or even garden rules. Use weatherproof paint to ensure they stand up to the elements. Secure them on a sturdy post or stick them directly into the ground. This simple addition can transform your garden into a whimsical adventure.
For budget-friendly options, check out local thrift stores or salvage yards for wood. You can even upcycle old pallets for an affordable solution. This project aligns beautifully with rustic or cottage-style gardens, making your outdoor space feel inviting and unique. A well-placed signpost not only adds charm but also guides guests, making your garden feel more organized and cohesive.
• Use reclaimed wood for an eco-friendly approach
• Choose vibrant colors to stand out against greenery
• Personalize with quotes for a fun touch
• Place signs at paths to guide your guests
14. Flower Pot People

Ready to bring your flower pot people to life? Start by choosing a color palette that matches your garden’s vibe. You can even involve children in this fun DIY project! It’s budget-friendly too—most materials are easy to find or repurpose. Secure your creations with a little glue or a sturdy base to keep them from tipping over. Placing them near seating areas invites smiles and creates a welcoming atmosphere. Your garden will feel vibrant and full of personality, perfect for entertaining friends or just enjoying a sunny afternoon.
• Stack pots creatively to form bodies
• Paint with bright colors to add character
• Secure with glue to avoid tipping
• Place near seating for a charming display
Get started today and watch your garden come alive with these whimsical flower pot people!
15. Colorful Pallet Herb Garden

Spruce up your outdoor space with a colorful pallet herb garden. This eye-catching project not only adds a burst of color to your backyard but also gives you fresh herbs right at your fingertips. Imagine vibrant greens and purples dancing in the sunlight. You can create a stunning visual display while enjoying the benefits of homegrown herbs like basil, mint, and cilantro.
Start by finding a sturdy wooden pallet, then unleash your creativity by painting it in bright colors. Think cheerful yellows, greens, or even a playful rainbow. Lay the pallet flat and fill each section with potting soil. Each slot becomes a cozy home for your herbs, making them easy to access for cooking or garnishing. This charming setup is perfect for brightening up any corner of your garden.
To make your herb garden a reality, follow these simple steps. First, choose a sunny spot in your yard; most herbs thrive in full sunlight. You don’t need to spend a lot—check local garden centers for affordable herbs and soil. You can even repurpose an old pallet for a fun, eco-friendly touch. Labels are a great addition too; they help you identify each herb while adding a personal touch.
• Pick a sunny spot for optimal growth.
• Use bright colors to make your pallet pop.
• Choose a variety of herbs for aesthetics and use.
• Add decorative labels to personalize your garden.
Creating a colorful pallet herb garden not only enhances your outdoor decor but also brings the joy of gardening into your life. It’s a fantastic way to express your style while enjoying the satisfaction of growing your own herbs. Why not give it a try? Your garden will thank you!
16. Upcycled Glass Bottle Edging
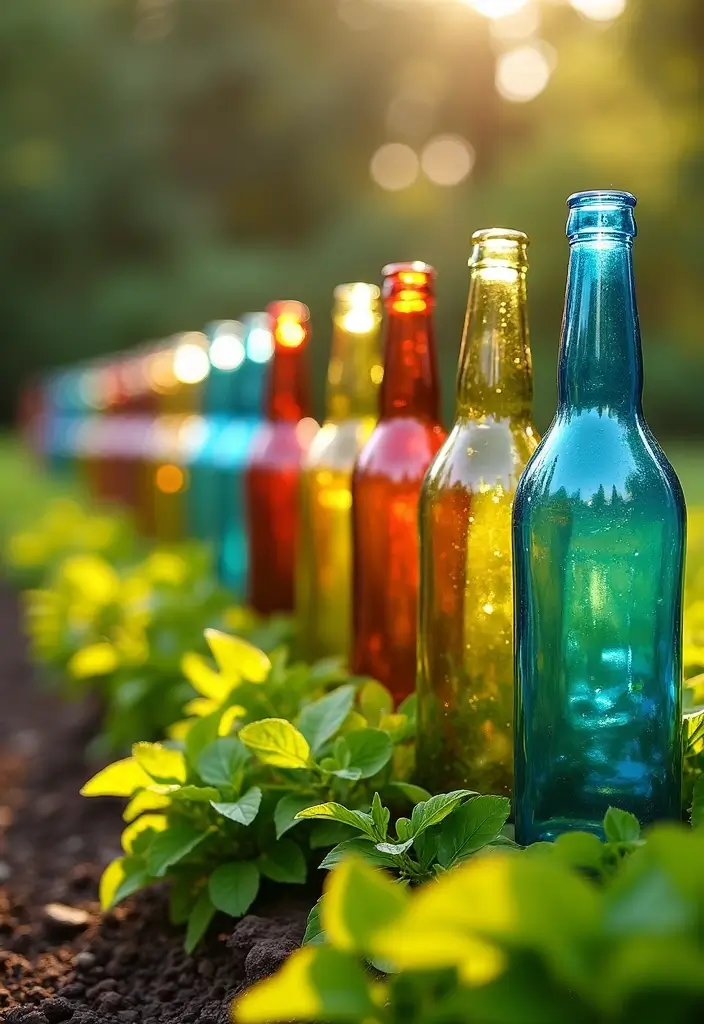
Want to give your garden a unique touch? Consider using upcycled glass bottles as beautiful edging! This creative project not only adds flair to your outdoor space but also helps reduce waste. Picture colorful bottles catching the sunlight and creating a sparkling border that makes your garden stand out.
Start by collecting various glass bottles. Choose a mix of colors—like blues, greens, and ambers—to create a lively effect. You can even use different heights of bottles for added visual interest. As you dig a trench along the edge of your garden, place the bottles neck down into the soil. Make sure they’re stable to withstand wind and rain. You’ll love how your garden reflects light and adds a whimsical touch, just like the trends you see on Pinterest!
When implementing this idea, think budget-friendly! Many bottles can be found for free or at thrift stores. This means you can design your garden without breaking the bank. Plus, this project connects beautifully with eco-friendly trends, making your garden not only stylish but also sustainable. Imagine walking through your garden and feeling a sense of pride knowing you’ve contributed to the environment while creating something special.
• Gather colorful bottles for a bright design
• Choose varying heights for a dynamic look
• Securely place bottles to withstand weather
• Consider local thrift stores for affordable finds
17. Wooden Spoon Garden Decor

Add a charming, personal touch to your garden with delightful wooden spoon decor! This simple DIY project not only brightens up your outdoor space but also showcases your creativity. Picture colorful painted spoons standing proudly in your garden, or hanging gracefully on a trellis. Pinterest is buzzing with this trend, and you can easily join in!
Start by gathering some old wooden spoons. Use bright, food-safe paints to transform them into unique pieces of art. You can paint flowers, patterns, or even whimsical faces. Once decorated, stick them into the ground or hang them on fences for a playful vibe. These handcrafted items can easily spark conversation among your guests and add character to your garden.
To keep costs low, check local thrift stores or garage sales for wooden spoons. This DIY project is budget-friendly and gives you a chance to express your style. Consider mixing these spoons with other DIY crafts like painted rocks or wind chimes for a cohesive garden theme. The result? A welcoming space that feels warm and inviting, perfect for family gatherings or quiet moments in nature.
• Gather old wooden spoons from thrift stores or your kitchen
• Paint with food-safe colors to ensure safety around plants
• Attach them to stakes or hang them for easy display
• Mix with other DIY decor for a fun, cohesive look
18. Upcycled Bicycle Planters

Give your garden a playful edge with upcycled bicycle planters. These quirky decor pieces not only add charm but also tell a story. Imagine an old bicycle frame transformed into a vibrant flower display that catches the eye. You can paint it in bright colors like sunny yellow or ocean blue, or keep its rustic patina for that vintage feel. Place it prominently in your garden or yard to create a delightful focal point that invites smiles and conversation.
To get started, find an old bicycle that you can repurpose. A trip to a local thrift store or a community garage sale might yield the perfect candidate. Make sure to clean it well and decide whether you want a fresh coat of paint or the original look. Fill the basket and other parts of the bike with soil, then plant colorful flowers or fragrant herbs. This approach is budget-friendly and eco-conscious, letting you beautify your space while being kind to the planet. Your garden will feel inviting and unique, perfect for enjoying sunny afternoons.
• Choose trailing plants for a cascading effect from the basket.
• Paint the bike in bold shades to brighten the garden.
• Secure the bike firmly to prevent tipping in the wind.
• Place it in a well-lit area to help plants thrive.
Upcycled bicycle planters are more than just garden decor; they’re a fun way to express your creativity. You’ll enjoy the process of transforming something old into a beautiful addition to your outdoor space. Plus, your garden will become a conversation starter, making it feel even more like home.
19. Log Slice Garden Art

Add a splash of rustic charm to your garden with log slice art! This DIY project allows you to bring nature into your space while showcasing your creativity. Imagine smooth, hand-painted log slices peeking out from your flowerbeds or lining your garden path. The warm browns and earthy tones of wood can blend beautifully with vibrant flowers, creating a cozy, inviting atmosphere. Pinterest is buzzing with these delightful pieces, and they can transform even the simplest gardens into unique showcases of personality.
Start by gathering log slices from fallen branches. Sand them down to a smooth finish, making them pleasant to touch. You can use wood stains or outdoor-safe paints to add your designs. Consider labeling them as garden markers for herbs or vegetables. This budget-friendly project not only beautifies your space but also helps you identify your plants easily. Once created, place these log slices throughout your garden to tie everything together, making it feel cohesive and well-designed.
• Gather fallen branches for a free supply of wood.
• Sand slices smooth for a polished finish.
• Use weatherproof paint to ensure durability against the elements.
• Arrange them thoughtfully to draw the eye and enhance garden flow.
This log slice art project is perfect for a weekend craft with friends or family. It’s a simple way to add character to your garden while working together. Enjoy the process and watch your garden come to life with your new creations!
20. DIY Garden Fairy Houses

Create a magical atmosphere in your garden with DIY fairy houses. These whimsical creations add charm and a touch of fantasy to any outdoor space. Picture tiny painted cottages nestled among your flowers, inviting imaginary friends to come and play. You can use small wooden or cardboard boxes as the base. Decorate them with bright paints, natural materials like twigs and leaves, or even recycled items from around your home. This trend, loved by many on Pinterest, lets you express your creativity while enhancing your garden’s beauty.
To get started, gather materials that won’t break the bank. You can find old boxes, scraps of wood, or even thrift store finds. Involve your family or friends for a fun weekend project. Not only will this activity spark creativity, but it also fosters teamwork. Once your fairy houses are ready, place them among your garden plants or in a quiet corner. This setup creates a cozy nook, making your garden feel inviting and enchanting.
Here are some tips to make your DIY fairy houses shine:
– Use waterproof materials to ensure they last through the seasons.
– Choose bright colors to make your houses stand out.
– Add pathways using small pebbles or colorful marbles.
– Place multiple houses to create a mini fairy village for added charm.
With a little effort, you can transform your garden into a whimsical retreat, perfect for sparking joy and imagination. Get ready to welcome fairies and brighten up your outdoor space!
21. Recycled Glass Garden Orbs
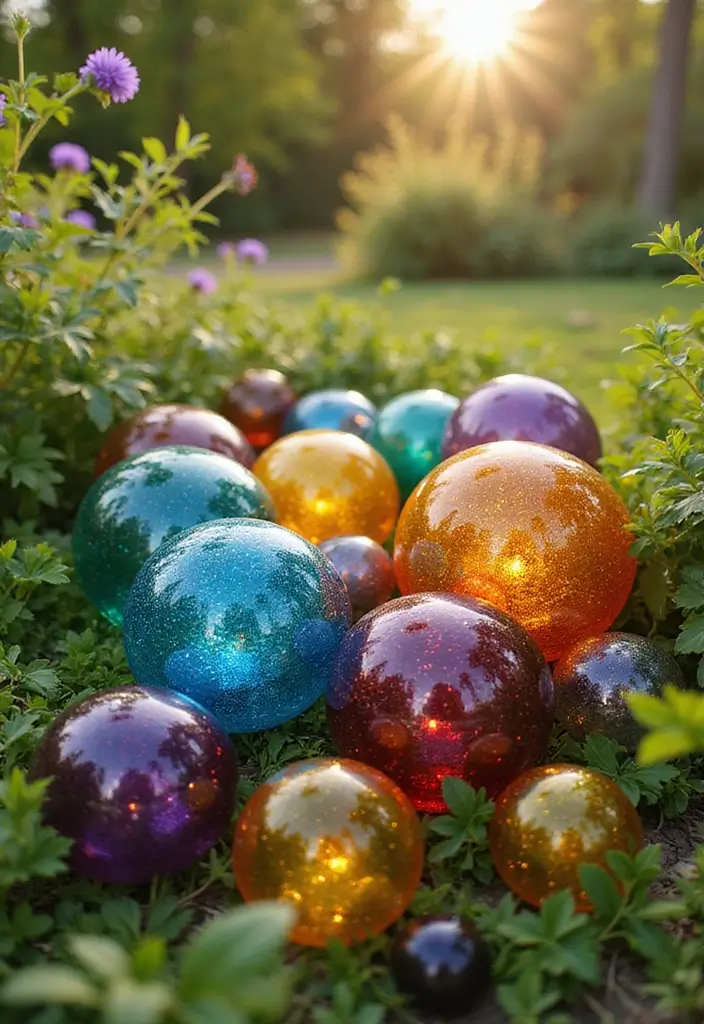
Brighten your garden with recycled glass garden orbs! These colorful accents not only add flair but also reflect light beautifully, creating a magical atmosphere. You can use old glass jars, bottles, or even colored glass objects to craft these orbs. Imagine the way the sunlight dances off a mix of deep blues, greens, and bright reds, captivating anyone who strolls by. This trend is a favorite on platforms like Pinterest, where DIY enthusiasts showcase their dazzling creations.
Start by gathering your glass containers. Fill them with colorful marbles, glass stones, or even fairy lights for a whimsical touch. Seal them with lids or leave them open for a peek at the treasures inside. Position your orbs on garden stakes or cluster them in groups to form a striking display. This project is budget-friendly, letting you transform your space without breaking the bank. Plus, these vibrant orbs can make your garden feel inviting and lively, perfect for summer gatherings or quiet evenings.
• Choose a variety of colors and sizes for a dynamic look.
• Place them in sunny areas to maximize light reflection.
• Secure them well to avoid tipping over in the wind.
• Add fairy lights inside for a magical glow at night.
22. Wind Spinner Garden Decor
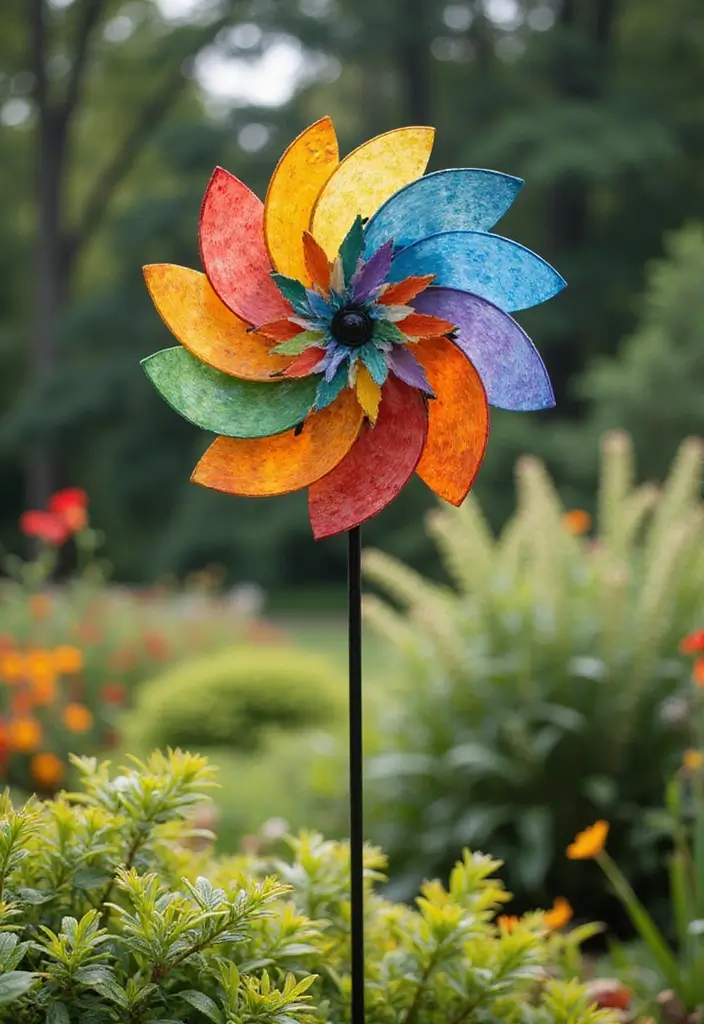
Add a splash of movement and color to your garden with stunning wind spinners! These delightful decorations can transform your outdoor space into a lively retreat. Picture vibrant bottle caps or recycled CDs twirling in the breeze, creating a playful atmosphere. Pinterest is buzzing with these creative ideas, showcasing how simple materials can add a touch of whimsy to your garden.
To make your wind spinners, gather materials like old plastic bottles, colorful paper, or even discarded silverware. Securely attach your creations to a slender garden stake so they can spin freely. Choose bold colors to catch the eye, and consider placing them in sunny spots to maximize their cheerful effect. You’ll create a magical scene where light dances off the spinners, making your garden feel alive.
Keep your project budget-friendly by using items you already have at home. This DIY craft not only saves money but also encourages creativity. Wind spinners fit beautifully into various garden styles, from rustic to modern. They’re perfect for adding personality and charm to any outdoor setting, making it feel warm and inviting.
• Use recycled materials for an eco-friendly project
• Choose vibrant colors to make a bold statement
• Attach securely to withstand the wind
• Experiment with shapes for visual interest
23. Upcycled Shoe Planters
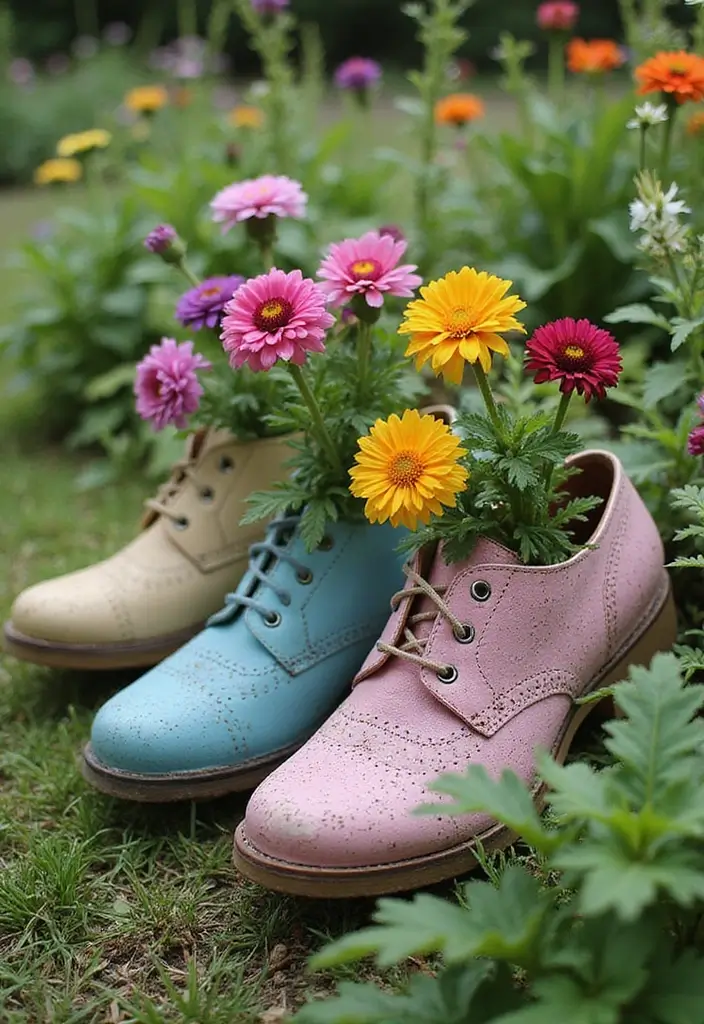
Imagine stepping into your garden and being greeted by charming planters made from upcycled shoes. This fun project not only adds a splash of personality to your outdoor space but also gives new life to worn-out footwear. Whether you choose colorful sneakers or rustic boots, these quirky planters are sure to brighten up any corner of your garden.
Start by gathering some old shoes that are no longer fit for wearing. Clean them out thoroughly to prepare for planting. Next, drill small holes in the soles for drainage. This step is crucial to keep your plants healthy! Fill each shoe with potting soil and plant your favorite blooms or trailing vines. Arranging them in groups creates an eye-catching display that is both playful and artistic, perfect for showcasing on garden paths or near seating areas.
Now, let’s dive into how you can make this project work for you. This DIY craft is budget-friendly, allowing you to recycle while being creative. Look for shoes that reflect your garden’s style; bright colors can liven up a space, while earthy tones can blend in beautifully. If you have kids, involve them in selecting and planting; this can be a fun family activity that brings everyone together.
• Use shoes that match your garden’s color scheme for harmony.
• Choose various sizes to create visual interest and depth.
• Pick trailing plants like ivy or petunias for a whimsical effect.
• Place them near your favorite sitting spots to enjoy their charm.
With upcycled shoe planters, your garden can be a unique reflection of your personality. It’s a delightful way to express creativity while caring for the environment. Plus, every time you see them, they’ll remind you of your playful spirit and love for gardening!
24. Stenciled Garden Borders

Stenciled garden borders can transform your outdoor space from ordinary to extraordinary. Imagine walking through your garden and being greeted by colorful designs or inspiring quotes framing your flower beds. You can use reclaimed wood or natural stones to create these borders, adding a touch of rustic charm. Pinterest is buzzing with ideas for these designs, showcasing everything from bright florals to intricate patterns. This simple project not only enhances the beauty of your garden but also reflects your personality.
To get started, gather your materials. Cardboard or plastic makes great stencils that you can easily cut out. Use weather-resistant paint to ensure your designs stand the test of time. You can find affordable paint options at local stores, making this project easy on your wallet. Think about using contrasting colors to make your designs pop. This will catch the eye and make your garden feel more inviting. With just a little effort, you can create a space that feels curated and special.
• Choose your materials: Use reclaimed wood or stones for a rustic touch.
• Create stencils: Cut shapes from cardboard or plastic for easy designs.
• Pick bright colors: Use weather-resistant paint for vibrant, lasting designs.
• Place strategically: Frame flower beds or pathways to enhance visual appeal.
This DIY project is perfect for anyone looking to express their creativity in their garden. You’ll love the way it makes your outdoor space feel personal and warm.
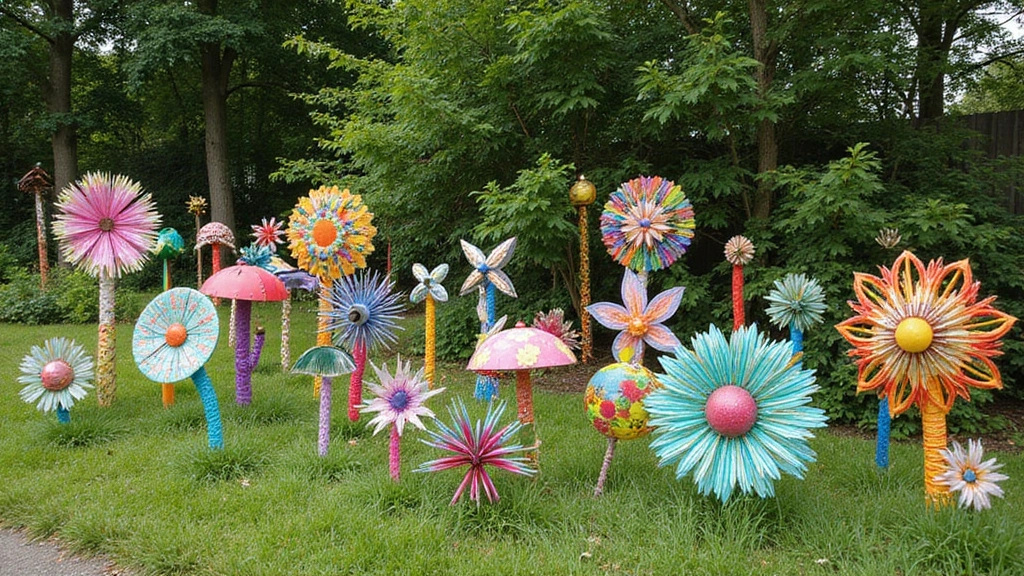
25. Upcycled Plastic Spoon Flowers

Brighten up your garden with delightful flowers made from upcycled plastic spoons! This creative project not only beautifies your outdoor space but also promotes sustainability. Imagine clusters of colorful blooms that bring joy throughout the seasons. You can paint the spoons in bright hues like sunny yellows, deep reds, and soft pastels to create a whimsical effect that catches the eye. Pinterest is buzzing with these eco-friendly designs, showcasing how they can add character to any yard.
Getting started is simple and budget-friendly. Grab some plastic spoons, paint them in your chosen colors, and let them dry. Next, connect the spoons to a sturdy base using a stake or a wire. You can cluster them together for a fuller look, resembling a blooming flower garden. This approach not only makes your garden pop but also allows you to express your creativity. Plus, these charming flowers are weather-resistant, especially if you add a clear coat for extra protection.
Here are some practical tips to make your spoon flowers shine:
Experiment with colors: Mix and match vibrant shades for a lively display.
Group them in clusters: Create a bigger impact by arranging several together.
Use sturdy materials: Ensure your base can withstand the outdoors by choosing strong stakes or wires.
Add a protective coat: Seal your creations with a clear spray for durability against the elements.
With these simple steps, you can create a garden that feels personal and inviting. These spoon flowers not only add color but also tell a story of creativity and care for the environment. So, roll up your sleeves, and let your garden bloom with your unique touch!
26. Whimsical Garden Banners

Bring a touch of whimsy to your garden with colorful fabric banners! These delightful decorations can instantly brighten up any outdoor space, making it feel more inviting and fun. You can create your banners using recycled fabrics, which not only saves money but also helps the environment. Try cutting bright fabric scraps into triangle shapes and attaching them to a sturdy string or rope. Hang these cheerful banners between trees or along fences to create a lively atmosphere. Pinterest is buzzing with ideas on how these banners can reflect your unique style, so let your creativity shine!
Start making your garden banners by gathering materials you already have at home. Look for old clothes or linens that you no longer use. This project can be very budget-friendly! If you want to make them last longer, consider using weather-resistant fabrics or adding a protective coating. You can even string lights along with the banners for a magical glow in the evenings, perfect for entertaining friends or enjoying a quiet night outside.
• Use recycled fabrics to save money and the planet
• Choose bright colors and fun patterns for a festive vibe
• Hang in groups for a more dynamic display
• Add fairy lights for an enchanting evening look
27. Painted Plant Pots
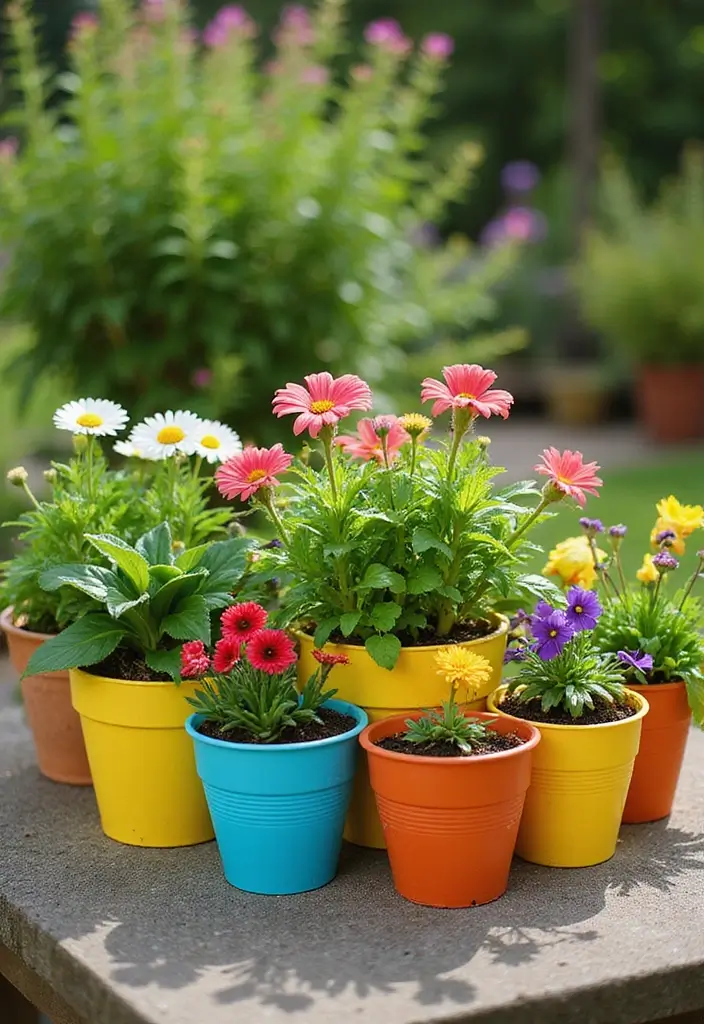
Give your garden a splash of color with painted plant pots. This fun DIY project allows you to express your creativity while adding a personal touch to your outdoor space. Imagine bright, bold designs on your pots, making your plants pop! You can use terracotta or plastic pots in a variety of sizes. Try painting them in rich hues like turquoise, sunny yellow, or deep purple. Pinterest showcases stunning examples where people have turned ordinary pots into mini works of art.
To get started, gather your materials. Clean your pots to ensure the paint sticks well. Use acrylic or outdoor paint for durability. Get creative with your designs—polka dots, stripes, or even floral patterns are all great options. If you want precision, try using stencils. Once your artwork is dry, seal it with a protective coat to help it withstand rain and sun. This project is budget-friendly and can easily transform the look of your garden, making it feel lively and welcoming.
• Choose vibrant colors to brighten your space
• Experiment with patterns like stripes or florals
• Seal with a protective coat for long-lasting beauty
• Use stencils for precise, neat designs
Painting pots not only enhances your garden’s charm but also allows you to showcase your unique style. Each pot tells a story, making your garden a reflection of you. Happy painting!
28. Rustic Wheelbarrow Planter
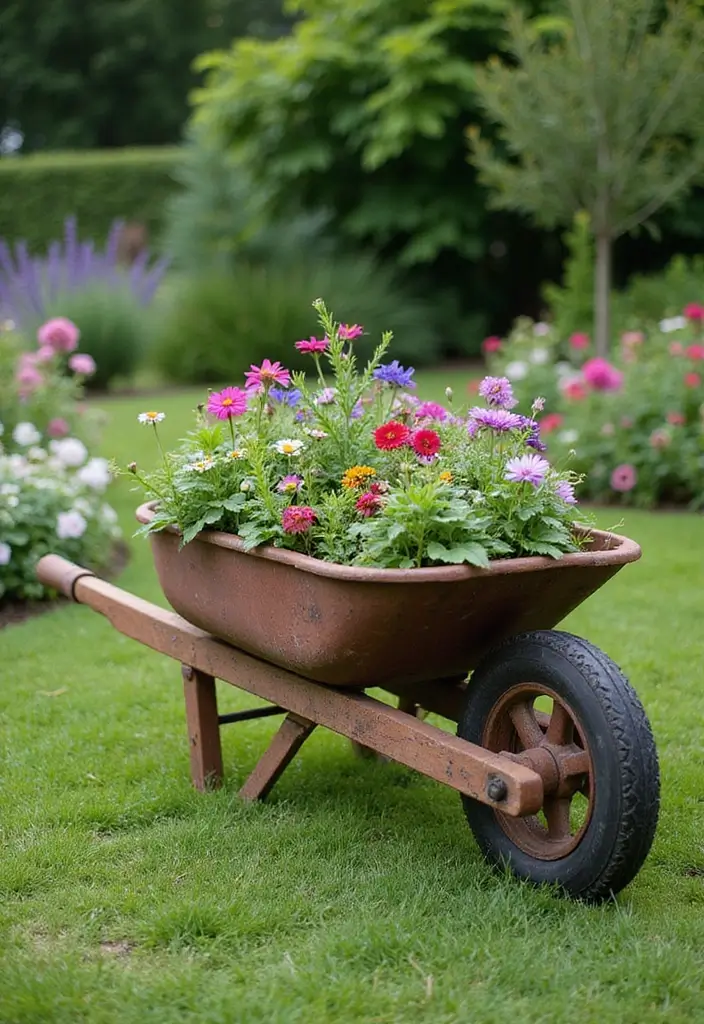
Transform an old wheelbarrow into a delightful rustic planter that adds character to your garden! This charming piece not only serves as a unique decorative element but also creates a functional space for your favorite plants. Imagine vibrant colors and lush greenery spilling out, drawing the eye and bringing warmth to your outdoor oasis. Pinterest is buzzing with these creative ideas, showcasing how wheelbarrow planters can become stunning focal points.
To start, clean your wheelbarrow thoroughly. If you want, add a splash of color with outdoor paint to enhance its appeal. Fill it with quality potting soil, then mix in a variety of flowers, herbs, or even vegetables. Place your wheelbarrow in a prominent spot in your garden where it can shine. This project is not only budget-friendly but also aligns beautifully with cottage and farmhouse styles. It makes your outdoor space feel inviting and personalized, perfect for relaxing or entertaining.
• Choose plants that match the sunlight in your garden.
• Pick trailing plants for a lovely cascading effect.
• Add personal touches like painted designs or a name.
• Place it strategically for maximum visibility and impact.
With a little creativity, your rustic wheelbarrow planter can become a beloved part of your garden, showcasing your personality and love for nature. Enjoy the process, and watch your garden flourish!
29. DIY Garden Mosaic Table

Bring a splash of color and creativity to your outdoor area with a DIY garden mosaic table! This project not only serves as a functional piece but also elevates the style of your patio or garden. Imagine a table adorned with vibrant patterns made from broken tiles, colorful glass, or smooth pebbles. It’s a beautiful way to showcase your personal flair.
You can start with an old wooden or metal table as your base. Look for materials that inspire you. Pinterest is brimming with ideas, from earthy tones to bright, cheerful hues. Choose colors that compliment your garden’s natural beauty. This project is trending, making it a great conversation starter during outdoor gatherings.
To create your masterpiece, gather your materials and follow these simple steps. First, sketch your mosaic design on the table. Use strong adhesive to attach your pieces, and then fill in the gaps with grout for a smooth finish. Remember, you can keep costs low by using recycled materials or leftover tiles. This DIY project not only beautifies your space but also gives you a sense of pride in your handiwork. Picture yourself enjoying coffee with friends at your stunning new table—what a perfect way to relax!
• Choose a sturdy table for your mosaic project.
• Use vibrant colors that match your garden style.
• Sketch a design before gluing tiles for better planning.
• Seal with grout to protect against weather changes.
30. Fun Garden Scrap Art

Transform your garden into a whimsical wonderland with fun garden scrap art! This project invites you to unleash your creativity using leftover materials. Think about pieces like old wood, scrap metal, or even fabric remnants. You can create colorful animals, cheerful flowers, or abstract shapes that spark joy. Place these unique creations throughout your garden to add a playful touch that reflects your personality.
To get started, gather your scraps and let your imagination soar! You don’t need to spend a fortune. Check local thrift shops or rummage through your garage for items that can be repurposed. Use bright, weather-resistant finishes to ensure your art withstands the elements. Consider organizing a scrap art day with friends. It’s a fun way to bond while making something beautiful. By choosing a theme, like woodland creatures or garden blooms, you can create a cohesive look that ties your space together, making it even more inviting.
• Use a mix of materials like wood and metal for variety.
• Pick bright colors to make your art pop against the greenery.
• Add protective coatings to keep your art looking fresh.
• Host a DIY workshop to share ideas and inspire creativity.
Start crafting and watch your garden come to life!
Conclusion
With these 30 creative garden crafts, you can add a personal touch to your outdoor space while embracing sustainability. Each project not only showcases your personality but also allows you to brighten your garden using recycled materials. Why not start crafting today? The joy of creating and enhancing your garden awaits!
Frequently Asked Questions
What are some easy garden crafts DIY yard art ideas for beginners?
Starting out in the world of garden crafts DIY yard art can be a fun adventure! You might want to try simple projects like painted rocks, homemade bird feeders, or colorful garden stakes. These outdoor craft projects not only add personality but also make for excellent conversation starters in your garden.
Choose recycled materials like glass bottles or tin cans to create unique handmade garden ornaments that reflect your style and creativity!
How can I incorporate recycled materials into my garden decoration ideas?
Incorporating recycled materials into your garden decoration ideas is both eco-friendly and budget-friendly! Consider using old pallets to build plant stands or transforming discarded tires into vibrant planters. You can also upcycle broken pottery into mosaic art pieces for your garden.
These creative yard art projects not only beautify your space but also reduce waste, making your garden a sustainable oasis!
What are some fun outdoor craft projects I can do with kids?
Engaging kids in outdoor craft projects can be a delightful way to bond while getting creative! Try making DIY wind chimes using old utensils or creating a fairy garden with small figurines and natural materials.
Another idea is to have them paint stones or create leaf prints. These hands-on activities not only spark creativity but also cultivate a love for nature and gardening in young ones!
Can I sell my handmade garden ornaments and yard art?
Absolutely! Selling your handmade garden ornaments and yard art can be a rewarding venture. Consider setting up a stall at local craft fairs, or even an online shop through platforms like Etsy. Be sure to showcase your unique style and the story behind your pieces, as that can attract buyers looking for something special.
Remember to market your work through social media to reach a wider audience and share your passion for garden crafts DIY yard art!
What tools and materials do I need for DIY garden projects?
For your DIY garden projects, you’ll need some basic tools and materials. Essential tools include scissors, glue, paint, and brushes. Depending on your project, you might also need items like wire, wood, or fabric.
Recycled materials, such as bottles, tin cans, and old furniture, can serve as excellent bases for your creative yard art. The possibilities are endless, so gather your supplies and let your imagination flourish in your garden!